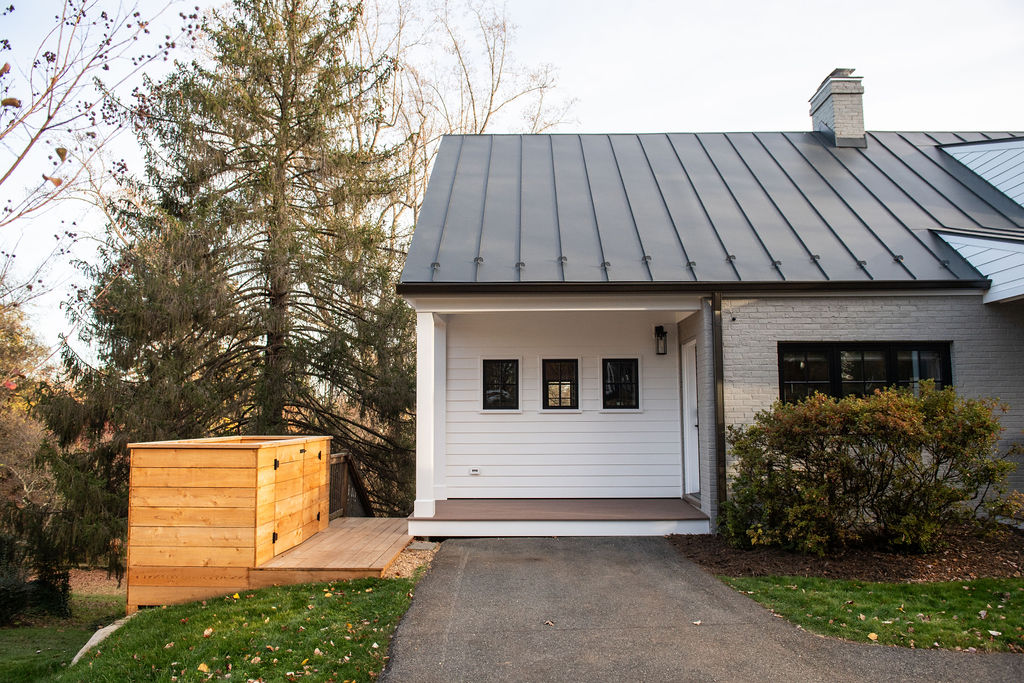
Here are some pics of our house’s exterior and the new DIY storage shed that replaced our garage storage.
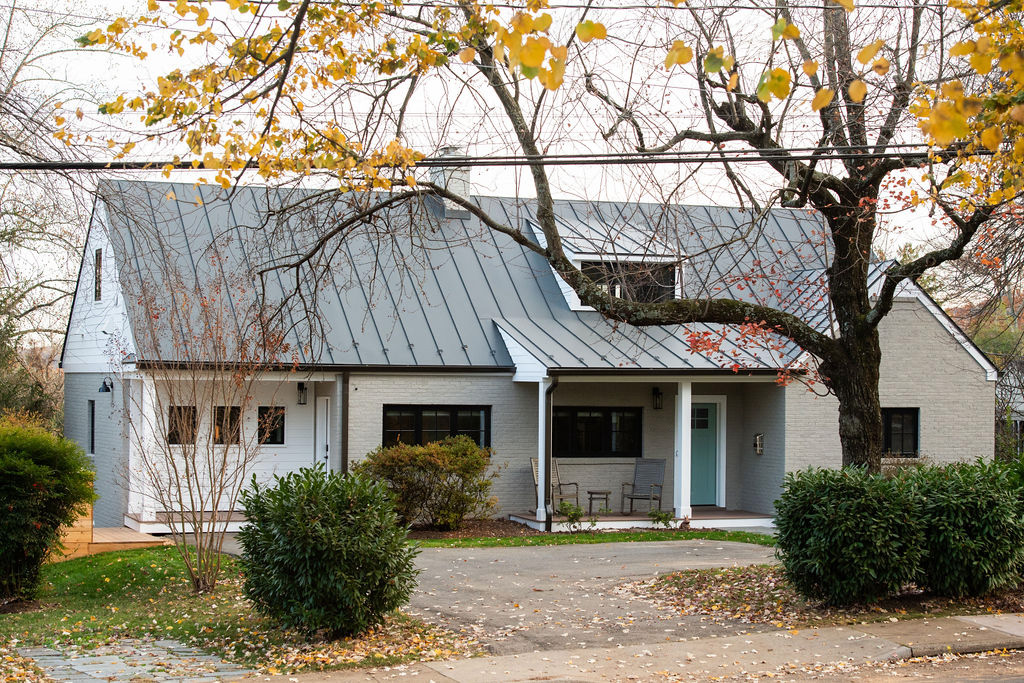
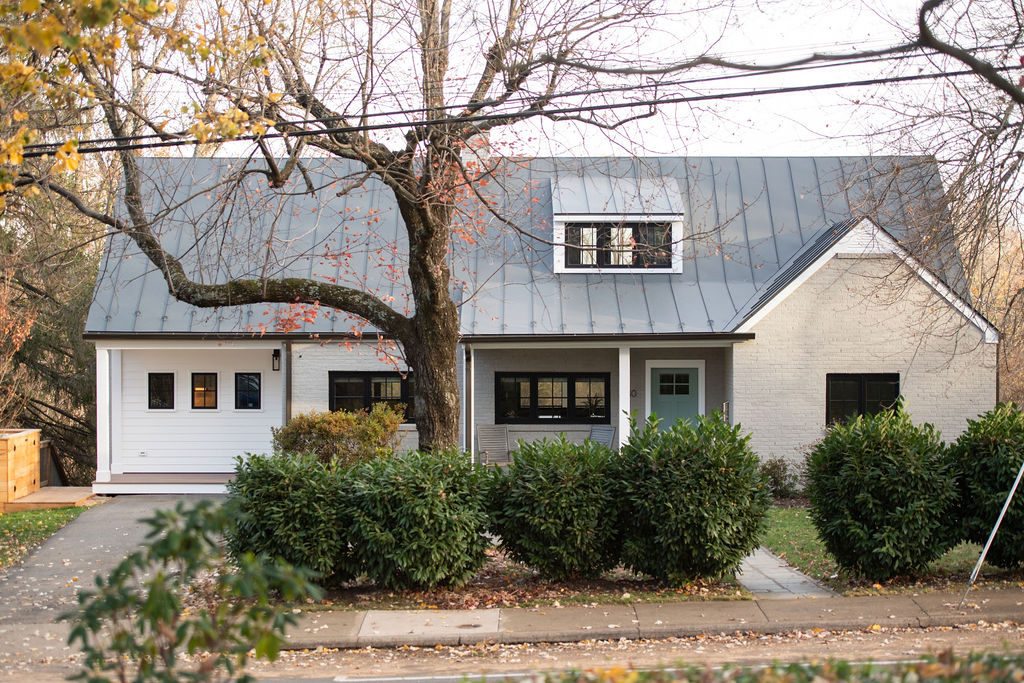
It’s Thomas’s birthday! So what better day to share his finally-finished home renovation that he put so much blood and sweat into (minimal tears : ) ) The grass has grown back after we tore it up to replace our water line, and he has finished his three exterior projects that he put off until after we were moved back in. If you’d like to see the full interior tour, check out the Home Tour Post.
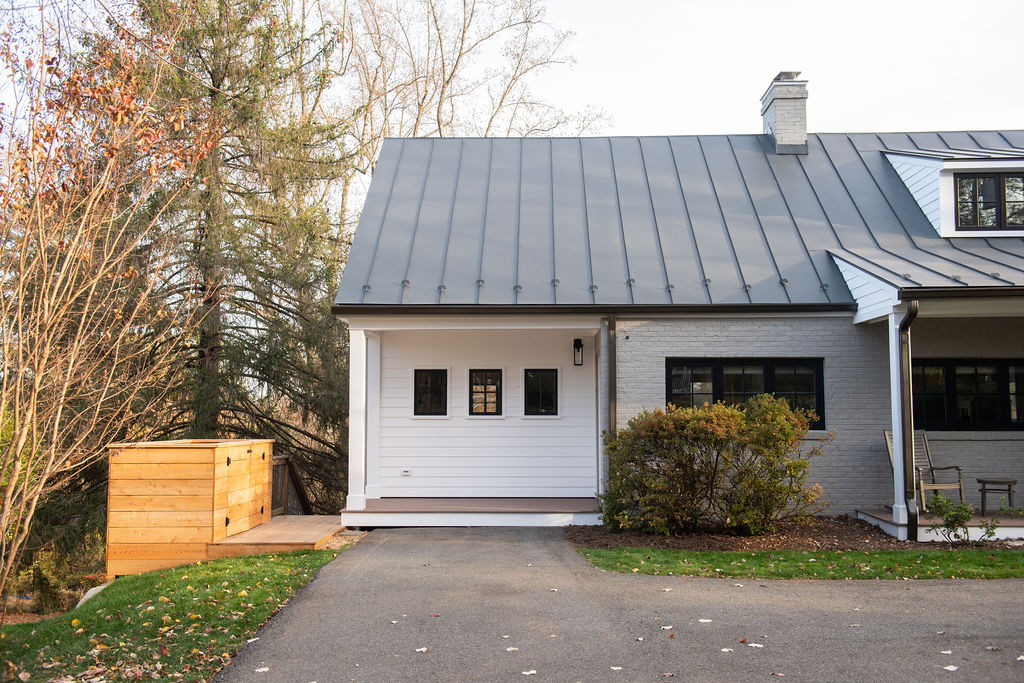
Here are a few polished pics of the exterior shot by Cramer Photo! You can see the side porch and trash storage that Thomas built himself, and then the new DIY storage shed is in the back. (It doesn’t look nearly as pretty when our cars are in the driveway : ) )
Before + Afters
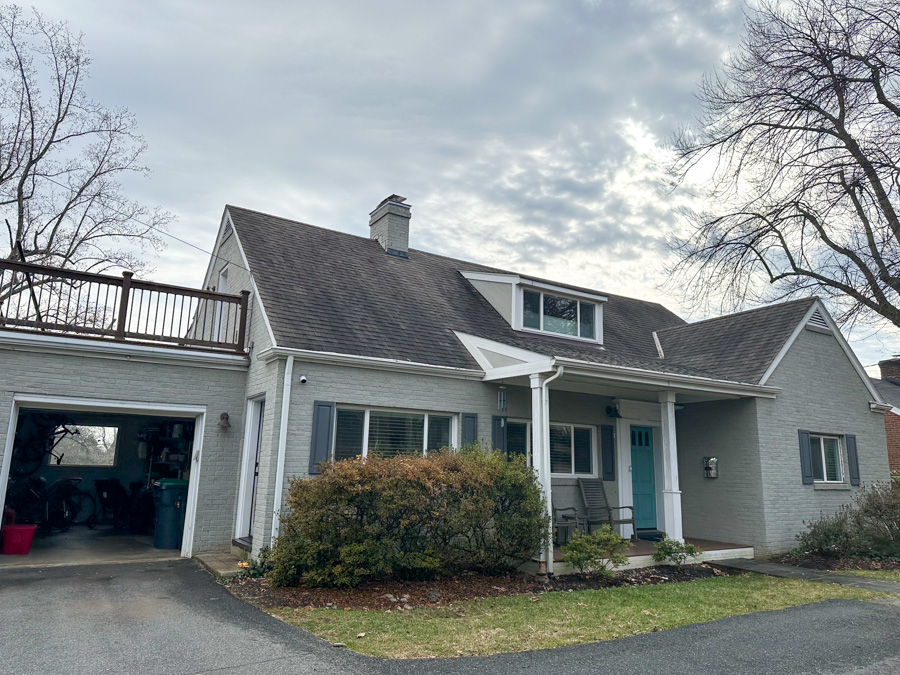
Way Before
(see more before pics here: Our House Before)
.tasty-pins-banner-container{display:block;margin-bottom:20px;position:relative;width:-moz-fit-content;width:fit-content}.tasty-pins-banner-container a{cursor:pointer;display:flex;font-size:14px;font-weight:700;letter-spacing:1px;line-height:1.8em;text-transform:uppercase}.tasty-pins-banner-container a:hover{opacity:1}.tasty-pins-banner-container .tasty-pins-banner{align-items:center;bottom:0;cursor:pointer;display:flex;justify-content:center;left:0;padding-bottom:1em;padding-top:1em;position:absolute;right:0}.tasty-pins-banner-container .tasty-pins-banner svg{margin-right:4px;width:32px}.tasty-pins-banner-container .tasty-pins-banner span{margin-top:4px}.tasty-pins-banner-container a.tasty-pins-banner{text-decoration:none}.tasty-pins-banner-container a.tasty-pins-banner:hover{opacity:.8}.tasty-pins-banner-container a.tasty-pins-banner-image-link{flex-direction:column}.tasty-pins-banner-container a img{margin-bottom:0}.entry-content .wp-block-image .tasty-pins-banner-container img{margin-bottom:0;padding-bottom:0}#et-boc .et-l div .et_pb_image_wrap .tasty-pins-banner-container .tasty-pins-banner{padding-bottom:1em!important;padding-top:1em;text-decoration:none}#et-boc .et-l div .et_pb_image_wrap .tasty-pins-banner-container a.tasty-pins-banner{cursor:pointer;display:flex;font-size:14px;font-weight:700;line-height:1.8em;text-transform:uppercase}#et-boc .et-l div .et_pb_image_wrap .tasty-pins-banner-container a.tasty-pins-banner span{letter-spacing:2px;margin-top:4px}.et-db #et-boc .et-l .et_pb_module .tasty-pins-banner-container a:not(.wc-forward){padding-bottom:0}
Just Before (Last January)
After!
The gray is actually the same shade, just refreshed in the renovation. It looks warmer due to the sun setting on it.
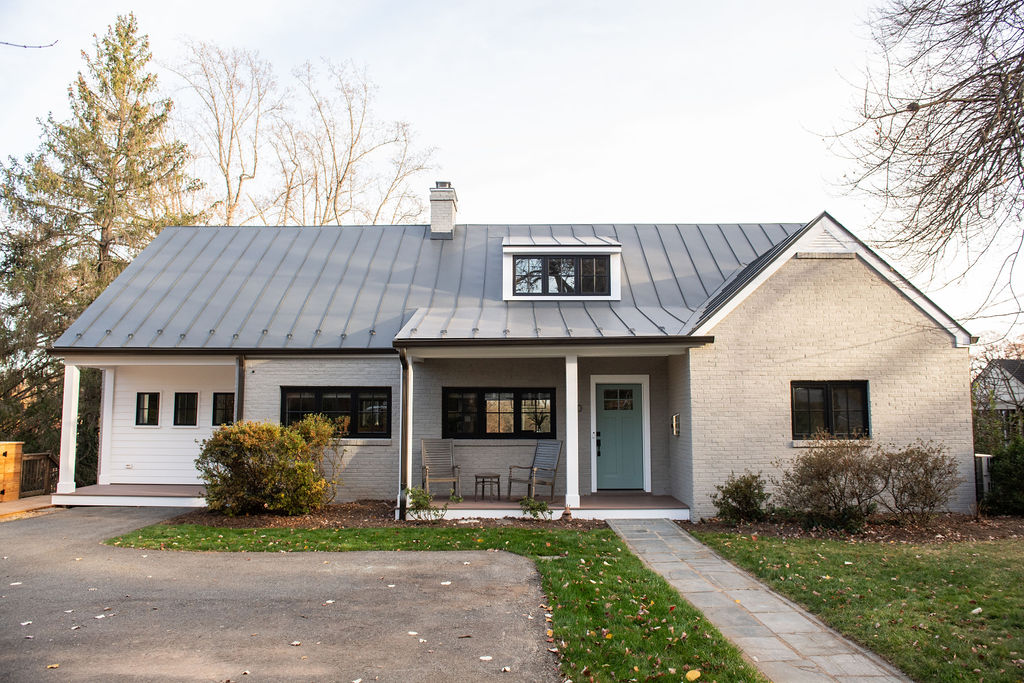
Exterior Finishes
- Brick paint: Sherwin Williams Fawn Brindle
- Front door paint: Benjamin Moore Stratton Blue
- White trim paint: Benjamin Moore Chantilly Lace
- Windows: Andersen E-series casements in black
- Roof: Englert Metal, 26 gauge standing seam in Charcoal gray
The Garage
As most of you know, we turned our garage into a kitchen and side porch, and extended the roof over the top, turning the roof deck we never used into finished living space with large walk-in closets and a storage room.
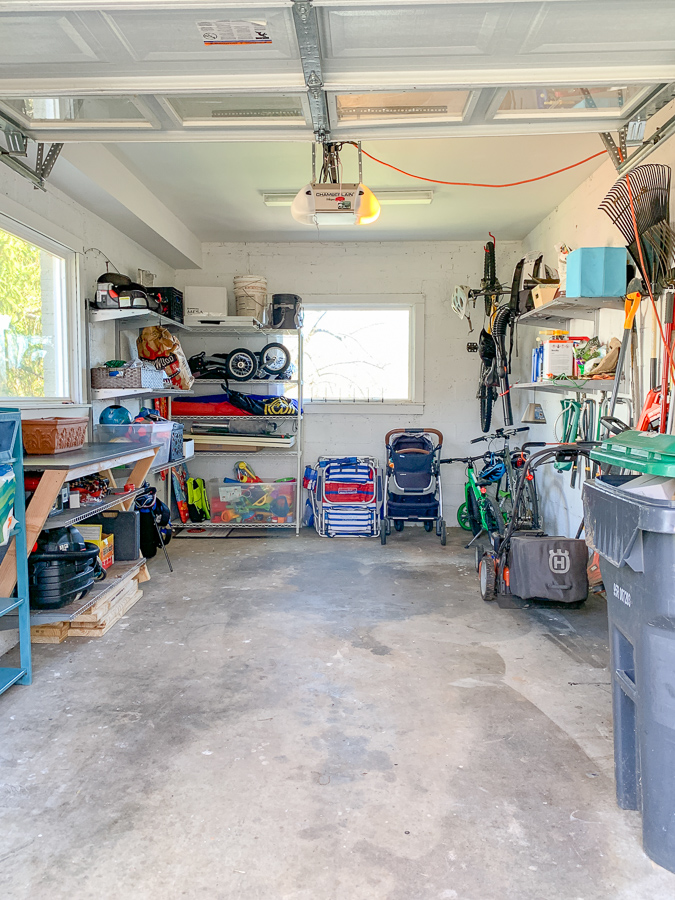
We didn’t use our garage for our cars – it was tiny and a car only would have fit if there was nothing else in the garage! Probably because it was built in 1960. Actually, it may have been an addition because it was an awkward box on the side of the house.
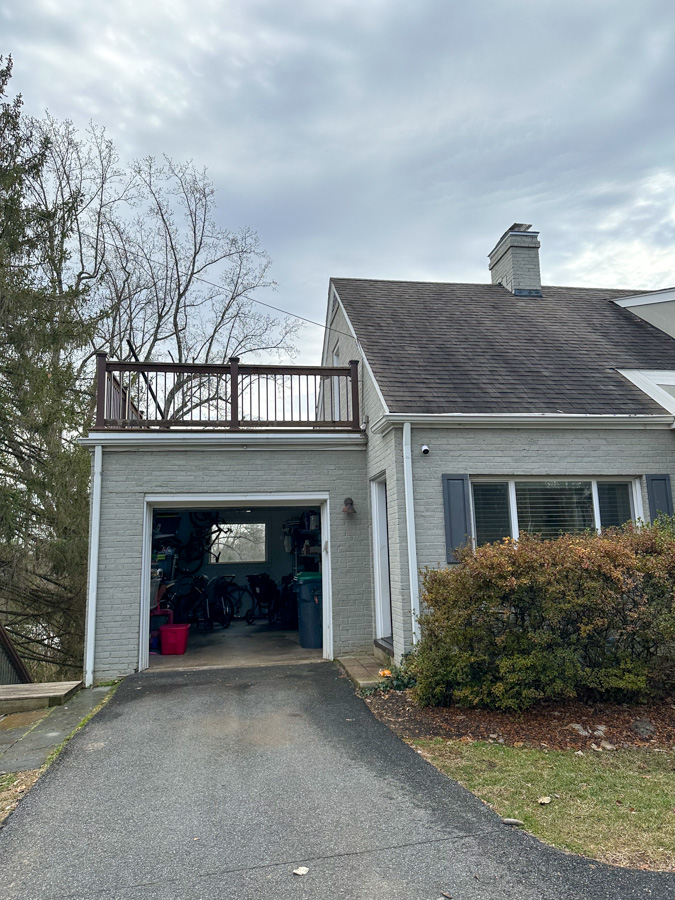
Since we thought more finished space and a bigger custom kitchen were way more valuable to us than a spider-filled garage, we decided it would go. We knew we could divide the things in the garage into four categories:
- Don’t need / donate
- Move inside to the storage room (coolers, beach chairs, sports equipment, even the bikes!)
- Yard supplies (lawn mower, shovels, rakes, tools)
- Trash cans
I don’t miss the garage one bit! Everything is so much happier stored inside.
We solved the trash can storage with our new Hidden Trash Can Storage. Thomas built this himself, and it’s actually way better than opening a garage door to access the trash. I love that it’s connected to the porch so you can wear slippers to go out there. And there is extra room for boxes too! The wood will fade over time.
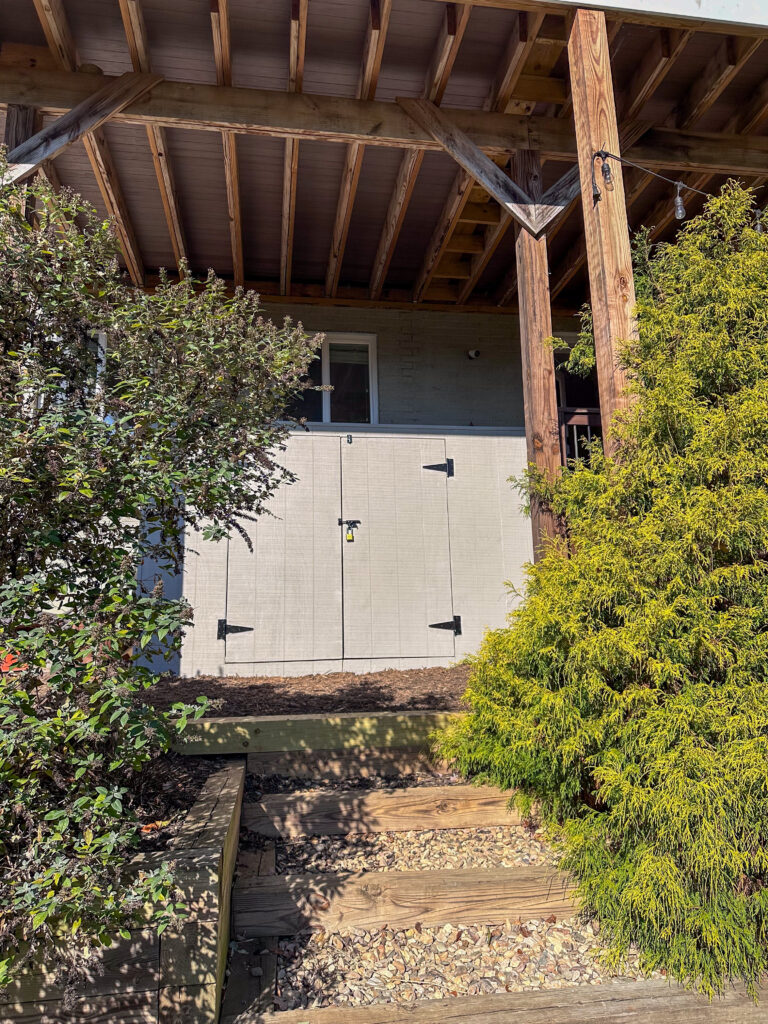
DIY Storage Shed
Then there was the problem of all the garden tools, lawn mower, etc. We debated a few different options:
- A ready-made tool shed (like this one). We were concerned with the quality and where it would go. They are so cheap!! We thought it might be able to go on our upper patio against the house. I was also worried about blocking the window in the Peloton room.
- A big yard shed. You know the ones that look like playhouses or barns? We don’t have a great flat spot for one, and they are also pretty expensive (a few thousand for a nice one).
- Something on the back of the house. We have the space, under the porch. We considered wall shelves, but it needed to be able to lock and be better protected from the elements.
We went with option #3: a DIY shed
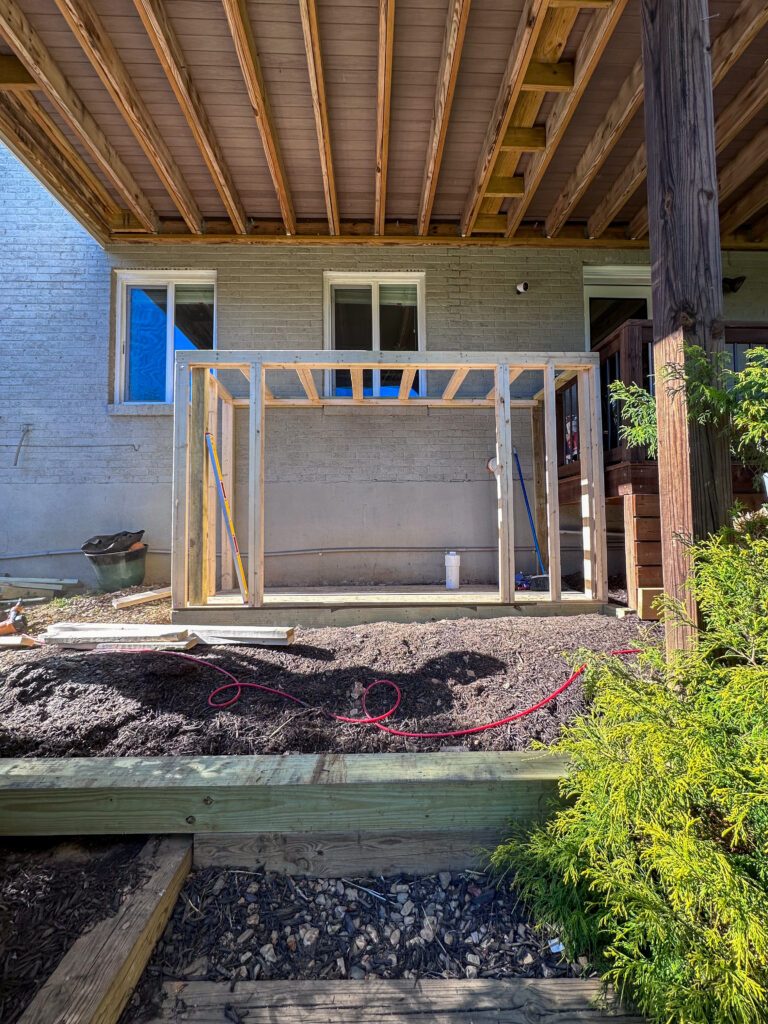
This area was total dead space under the porch. We didn’t use it, and it wasn’t pretty. It’s also mostly protected from the elements since the porch on top has a roof. So it was the winner for the area for storage. Thomas started building!
Step 1: Frame it out
He was able to hide that big white kitchen drain pipe inside, which was an extra plus. My only opinion was please don’t block the windows. He got within a millimeter, but followed suit.
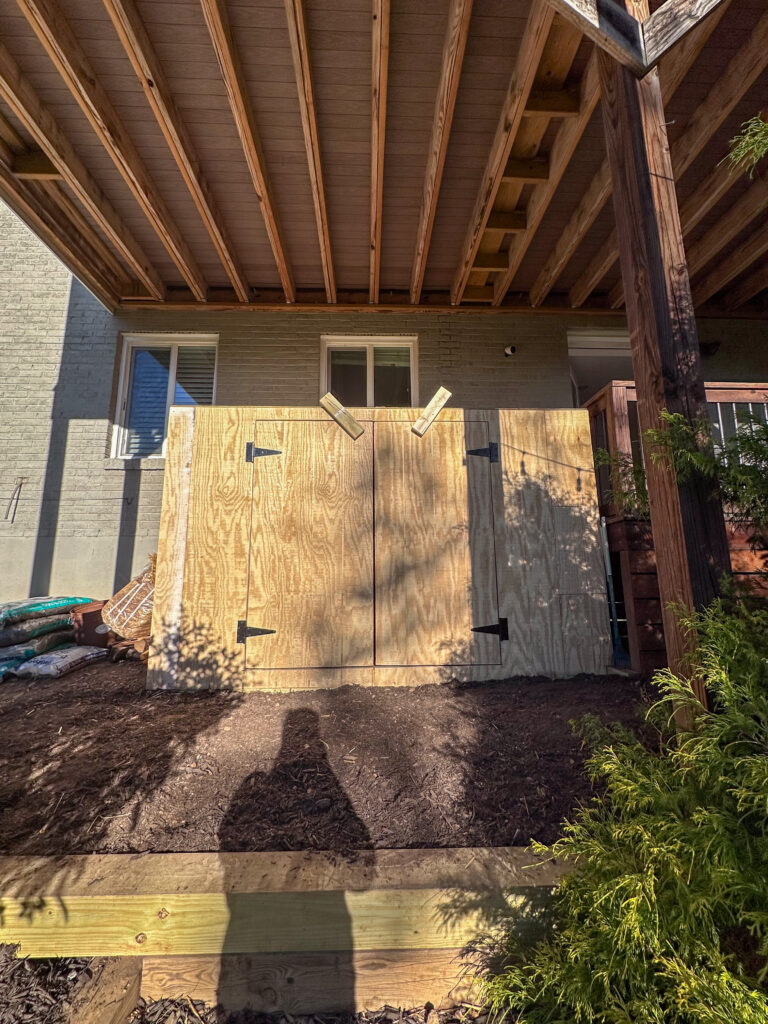
Step 2: Add a plywood roof, floor, and doors
Step 3: Paint it to match the house
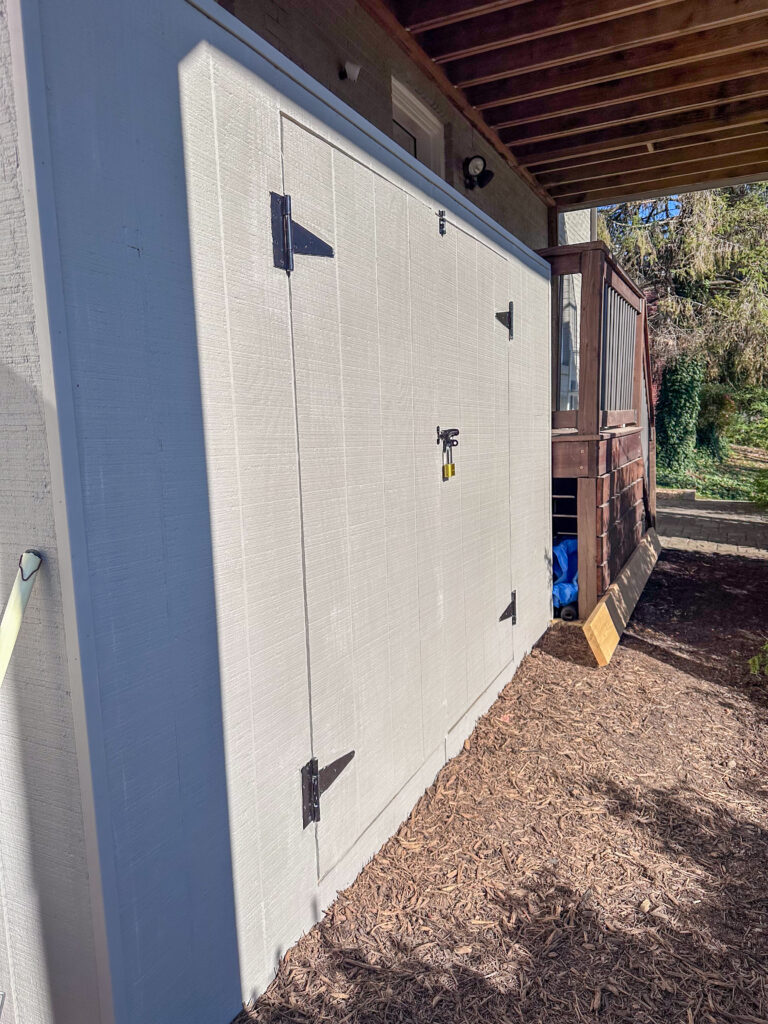
Step 4: Add a lock

Step 5: Fill it up!
He even mounted the old shelves from our garage to the house (the back wall) so he can store his garden and lawn things.
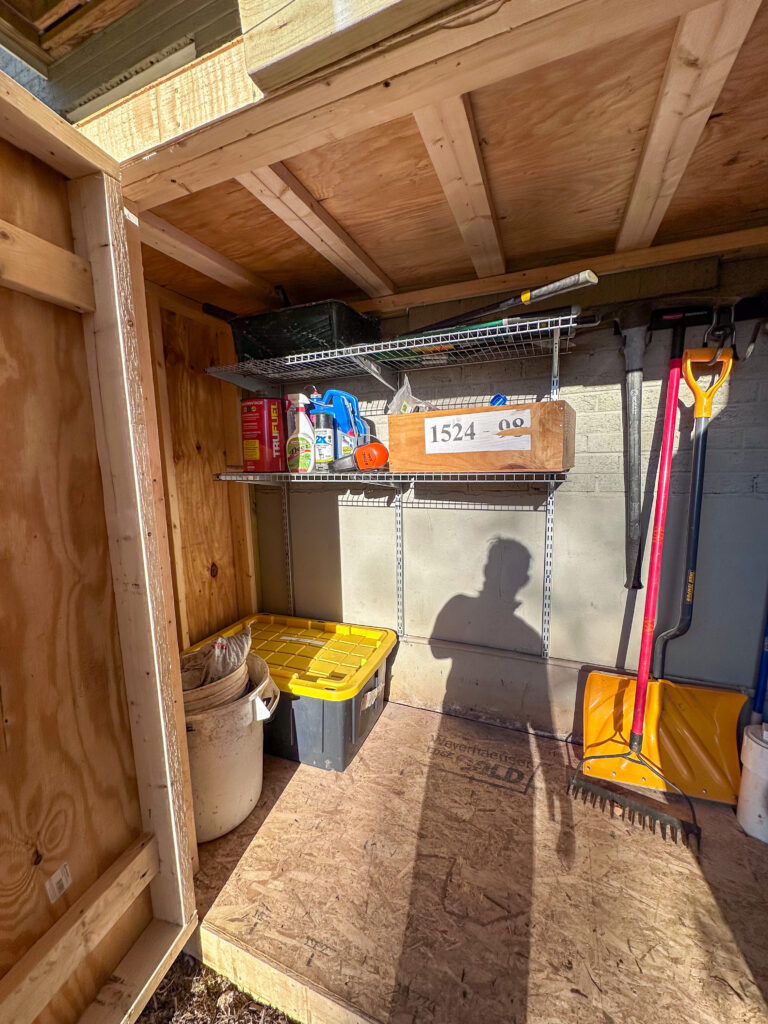
The new electric lawn mower fits in there nicely since it folds up. There is room for more tools.
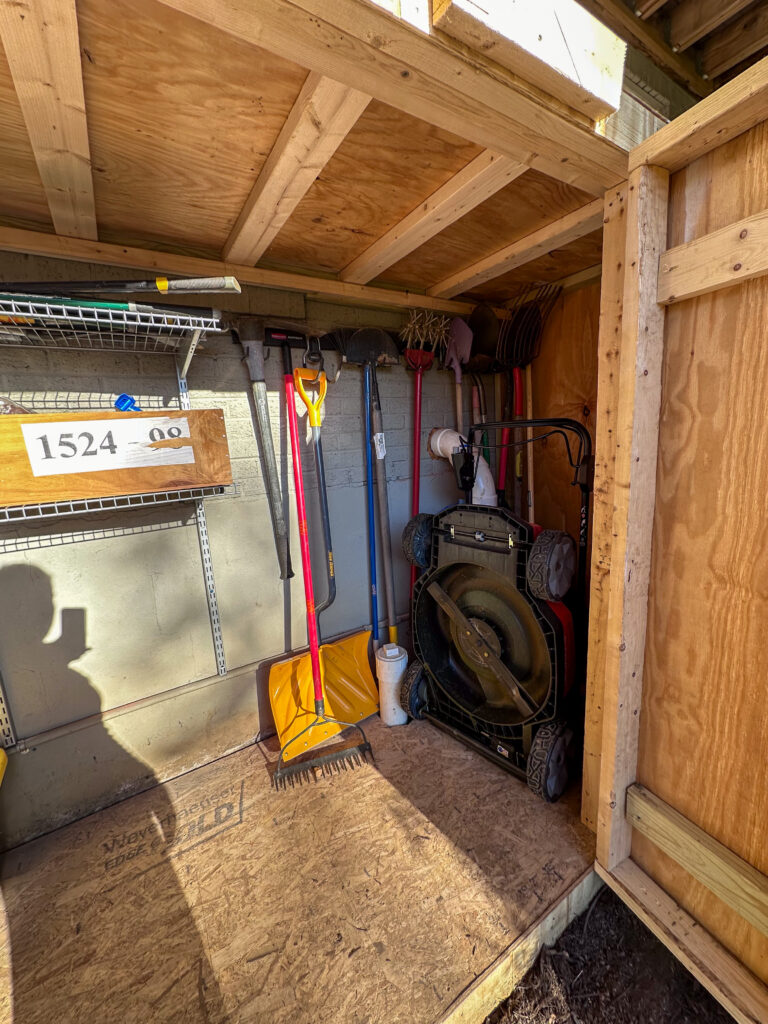
It’s not fancy, but it’s all his!
Happy birthday, Thomas!