
Here is the latest update from our home renovation as we add a kitchen in our garage! Click here for all of our renovation blog posts. Check out my Instagram story highlight “Demo” for all the live videos!
.tasty-pins-banner-container{display:block;margin-bottom:20px;position:relative;width:-moz-fit-content;width:fit-content}.tasty-pins-banner-container a{cursor:pointer;display:flex;font-size:14px;font-weight:700;letter-spacing:1px;line-height:1.8em;text-transform:uppercase}.tasty-pins-banner-container a:hover{opacity:1}.tasty-pins-banner-container .tasty-pins-banner{align-items:center;bottom:0;cursor:pointer;display:flex;justify-content:center;left:0;padding-bottom:1em;padding-top:1em;position:absolute;right:0}.tasty-pins-banner-container .tasty-pins-banner svg{margin-right:4px;width:32px}.tasty-pins-banner-container .tasty-pins-banner span{margin-top:4px}.tasty-pins-banner-container a.tasty-pins-banner{text-decoration:none}.tasty-pins-banner-container a.tasty-pins-banner:hover{opacity:.8}.tasty-pins-banner-container a.tasty-pins-banner-image-link{flex-direction:column}.tasty-pins-banner-container a img{margin-bottom:0}.entry-content .wp-block-image .tasty-pins-banner-container img{margin-bottom:0;padding-bottom:0}#et-boc .et-l div .et_pb_image_wrap .tasty-pins-banner-container .tasty-pins-banner{padding-bottom:1em!important;padding-top:1em;text-decoration:none}#et-boc .et-l div .et_pb_image_wrap .tasty-pins-banner-container a.tasty-pins-banner{cursor:pointer;display:flex;font-size:14px;font-weight:700;line-height:1.8em;text-transform:uppercase}#et-boc .et-l div .et_pb_image_wrap .tasty-pins-banner-container a.tasty-pins-banner span{letter-spacing:2px;margin-top:4px}.et-db #et-boc .et-l .et_pb_module .tasty-pins-banner-container a:not(.wc-forward){padding-bottom:0}
A Whole New House
You aren’t even going to recognize our house after this renovation update! I sure don’t. Sun Structures has been doing a fabulous job turning it from house to barn and back to house!
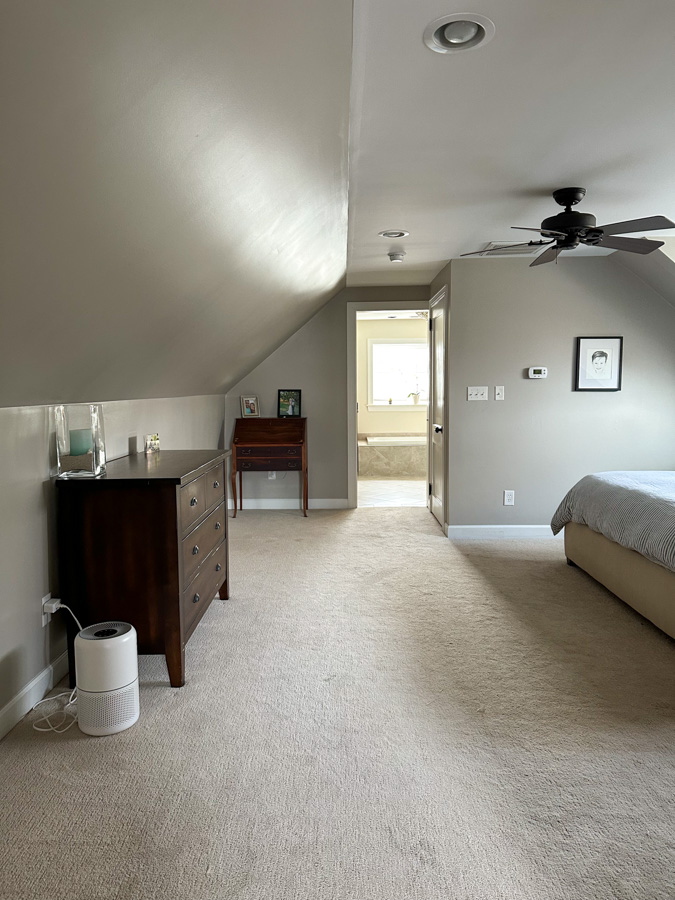
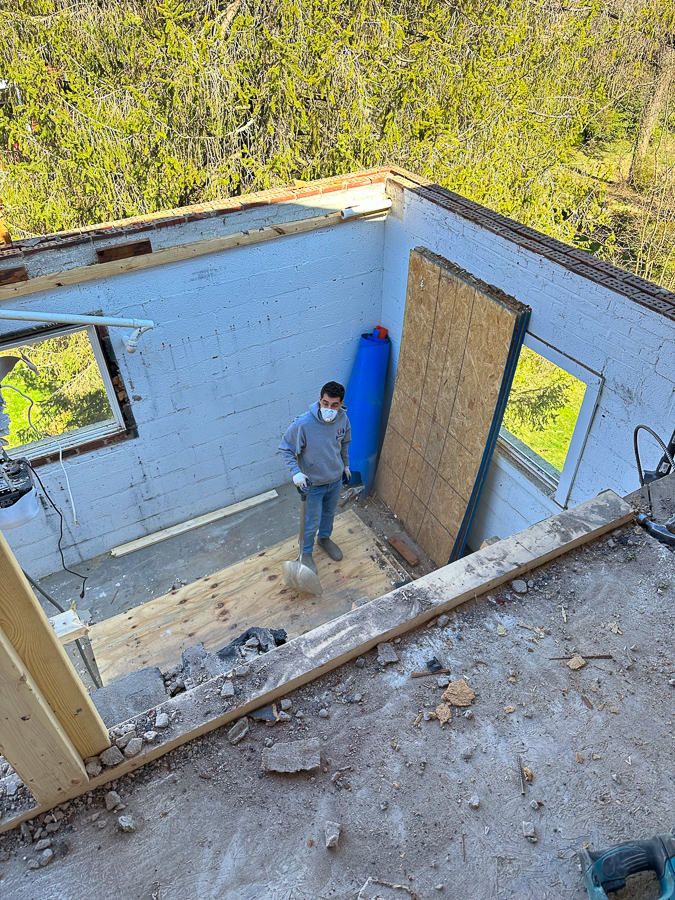
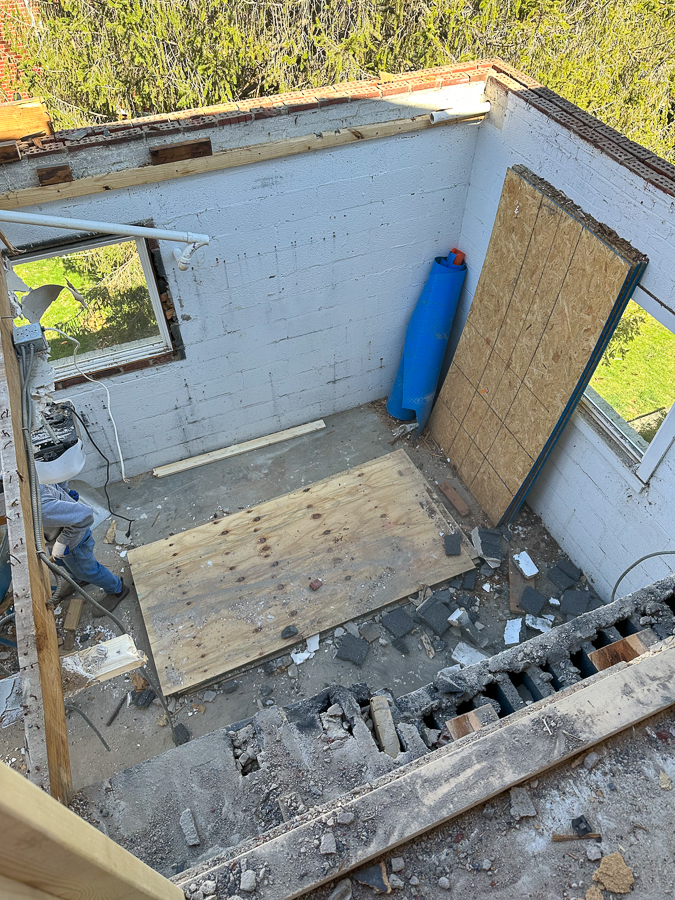
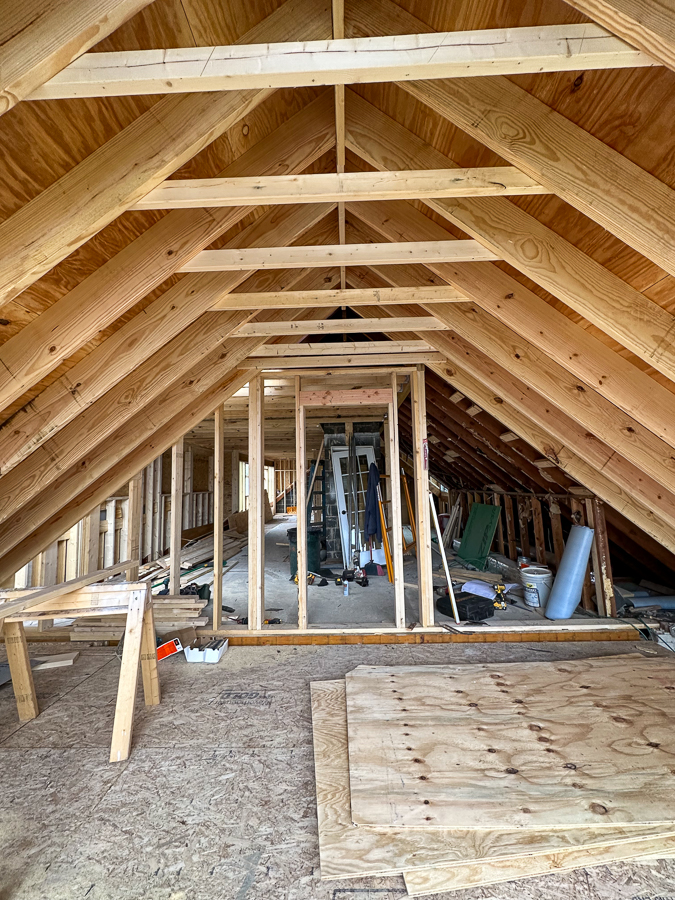
Here is what the upstairs bedroom looked like when I ended our demo week blog post:
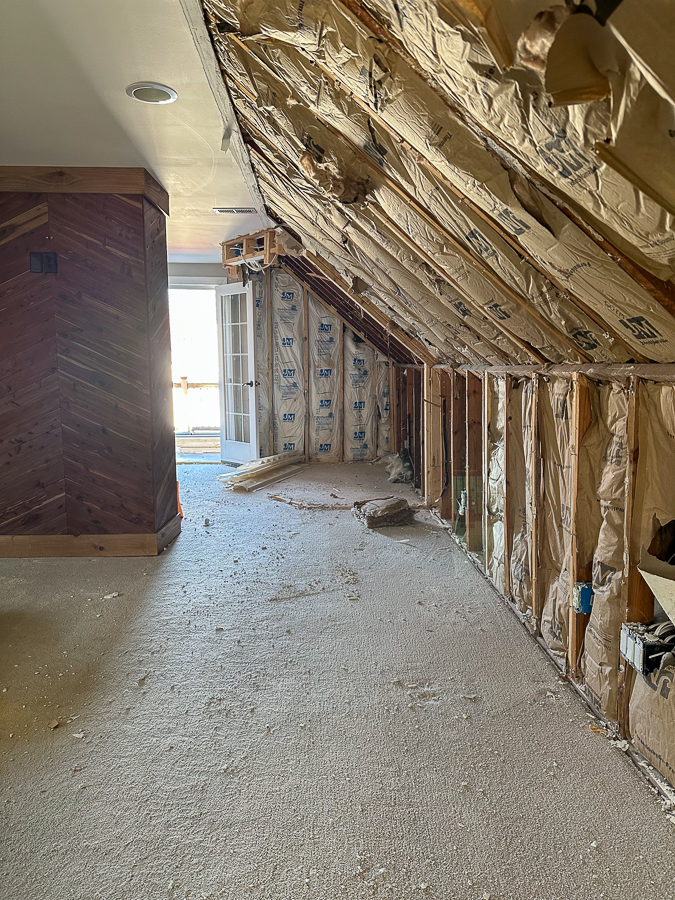
Here’s what it looked like before from this view:
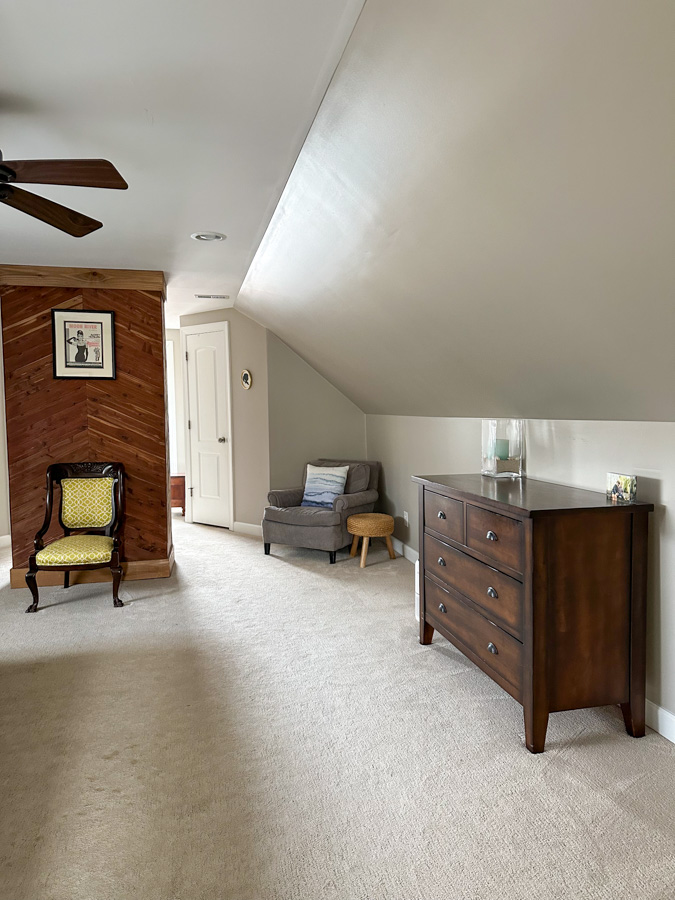
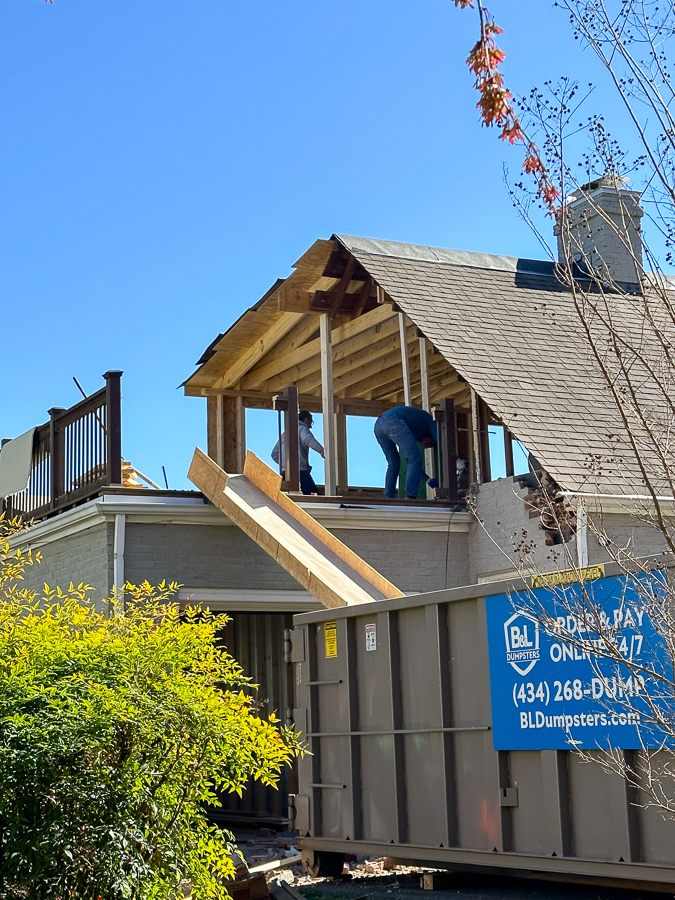
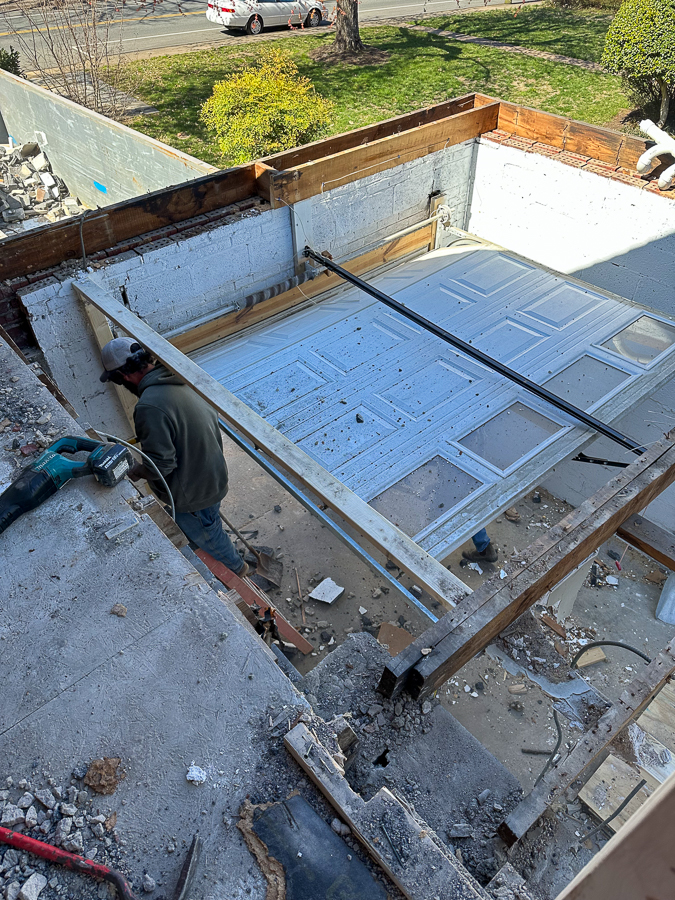
And here’s how it looked a few days later when the dormer was complete!
WINDOWS!!!!!!!! And headspace. And so much light!
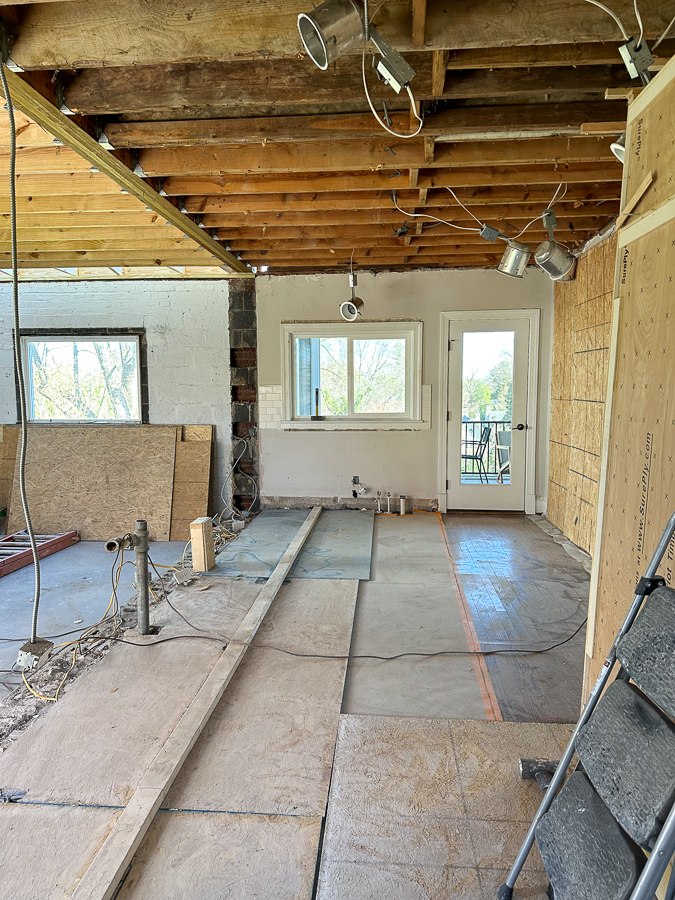
From the opposite side:
Before:
And now:
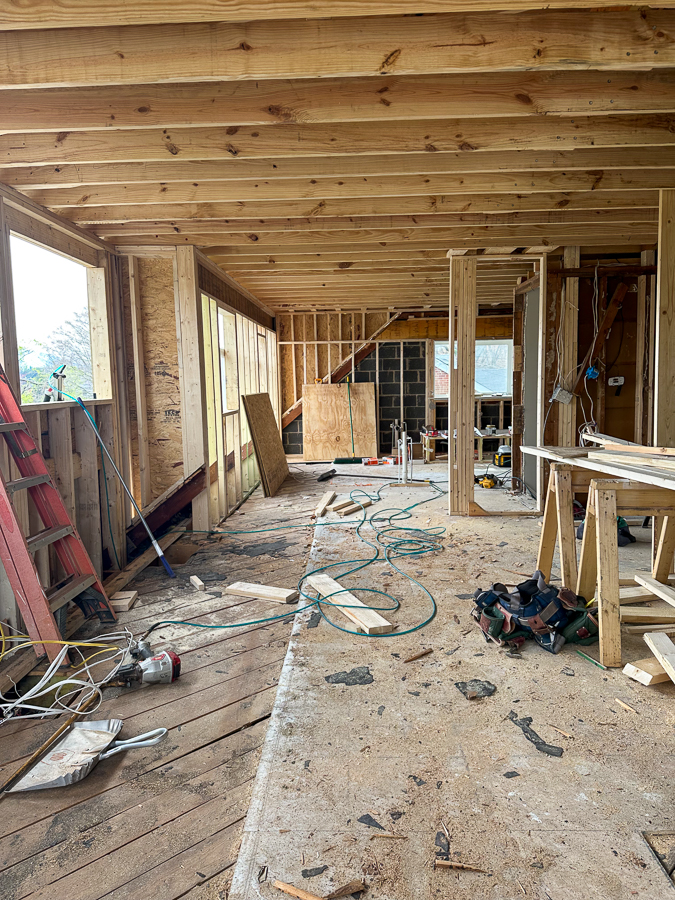
Of course it feels so open because there are no closets or bathroom walls, and the ceilings go all the way up. It will feel a little less open and airy when the drywall goes up, but for now I am loving how open it all feels.
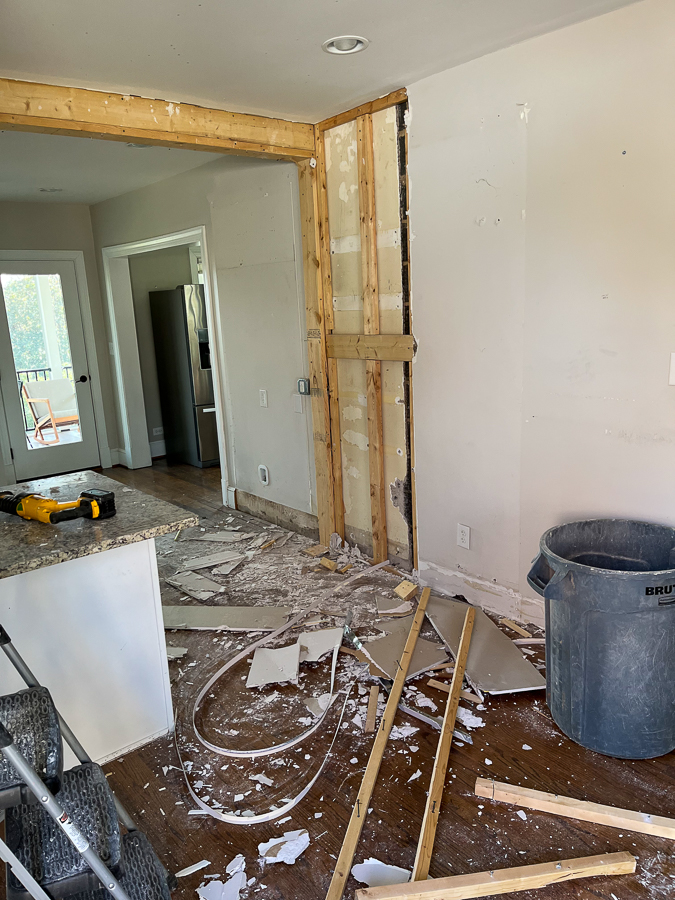
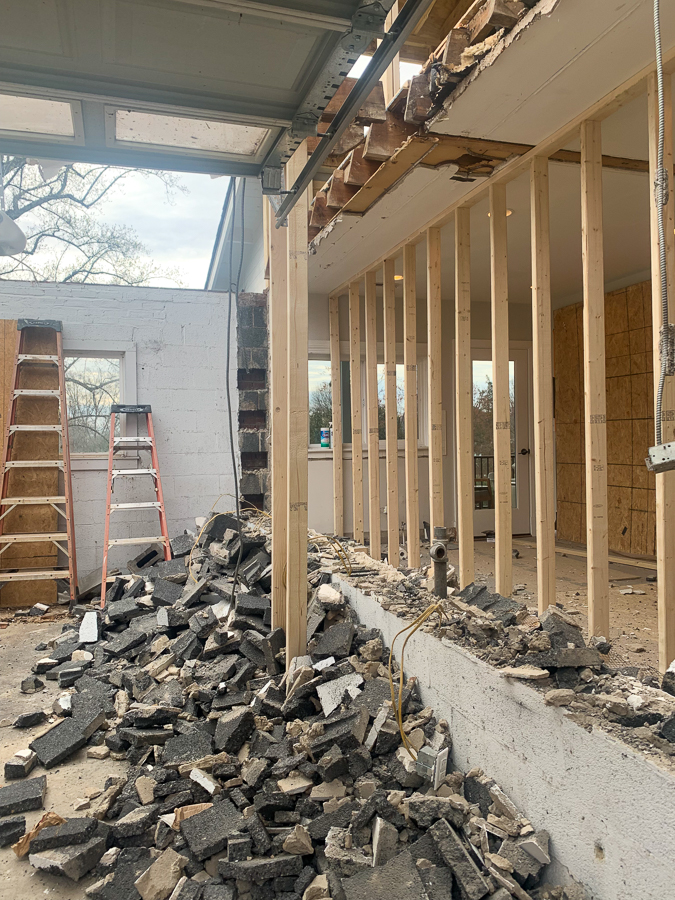
Walls Coming Down
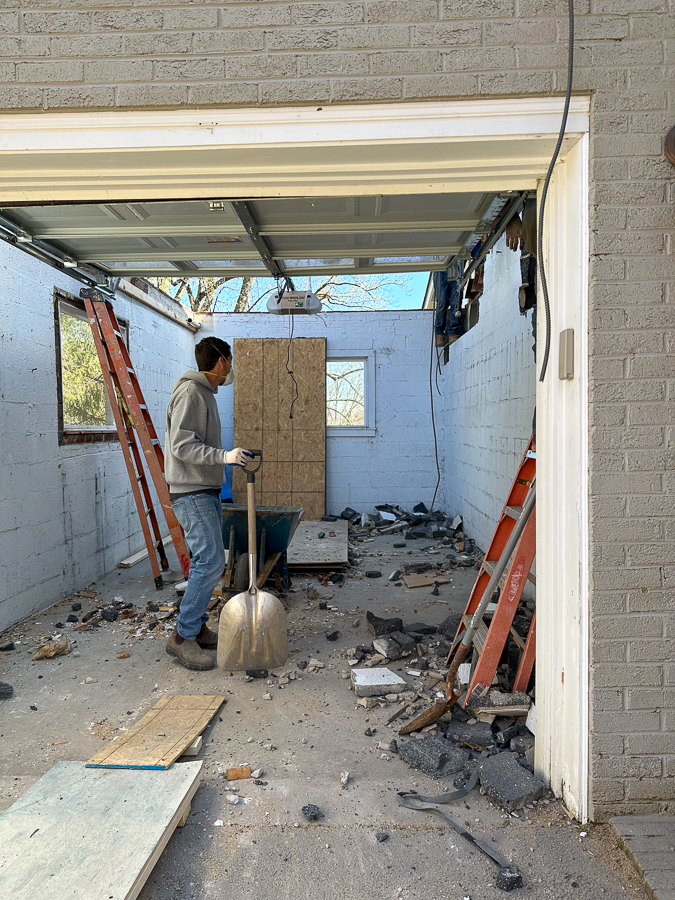
A big part of this renovation is opening up the wall between the kitchen and the garage. That wall couldn’t come down until the cinder blocks and brick that sat on top of it also came down.
So after the dormer was built, the outer wall of the house came down one block at a top.
Starting at the top until the whole bedroom was open air!
It was crazy to walk or drive by the house at this point! People had to wonder what was happening. It looked like the side just exploded out!
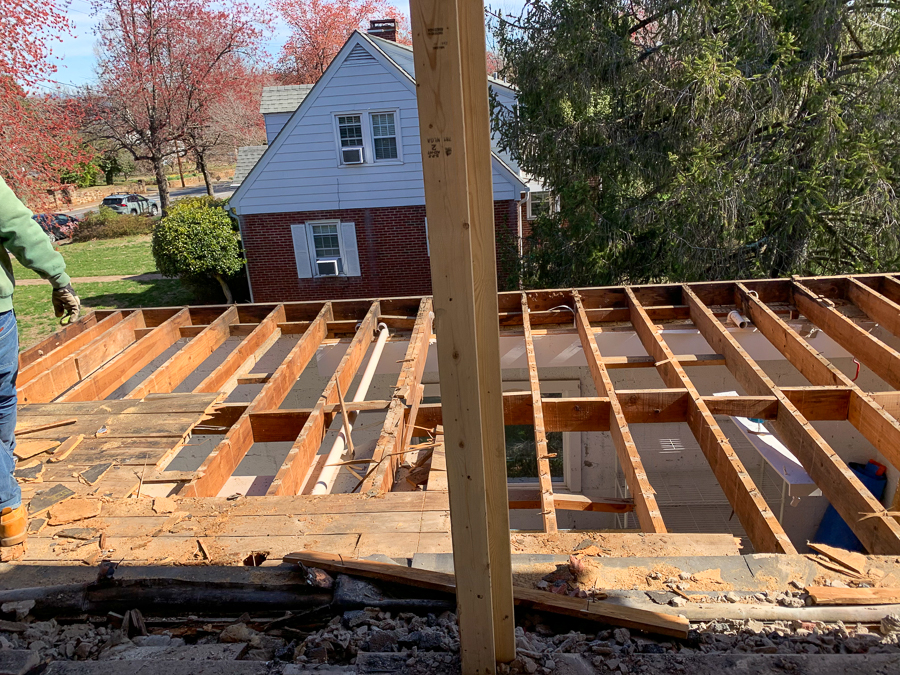
Demoing the Roof Deck
The roof deck that we used 8 times in 8 years was next to go until you could see right down into the garage!
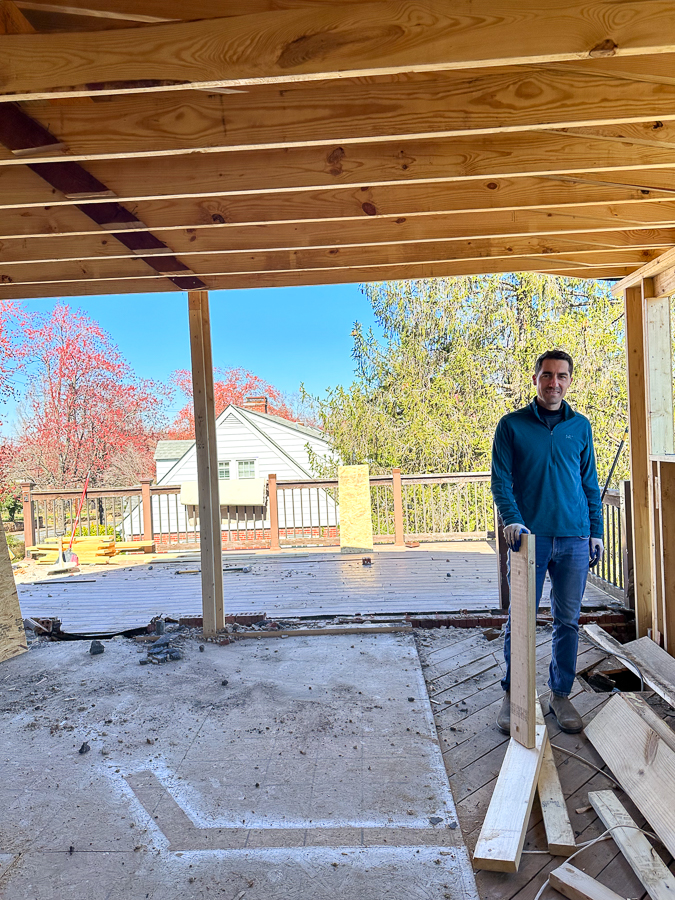
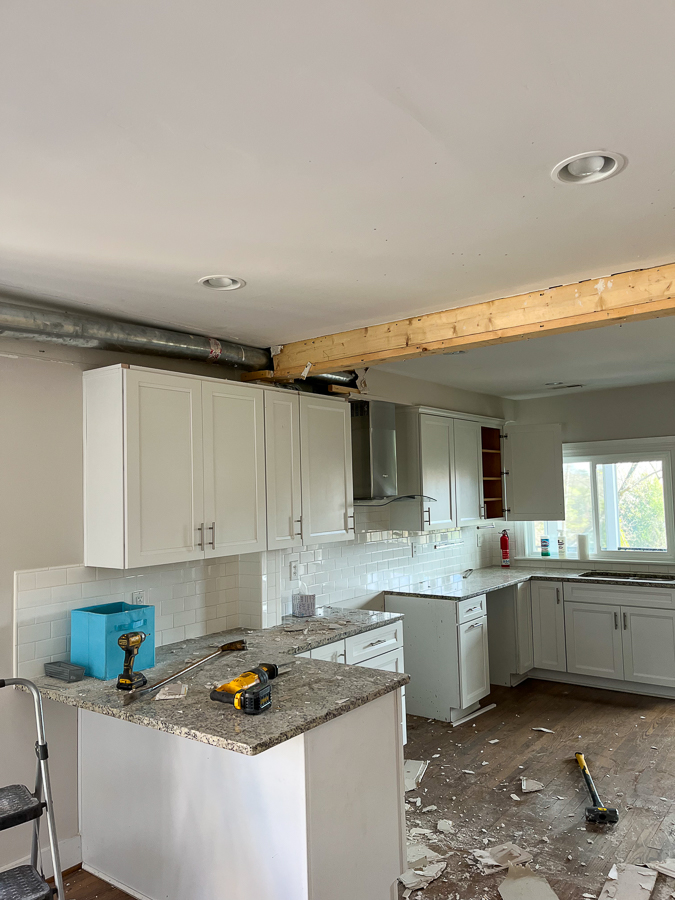
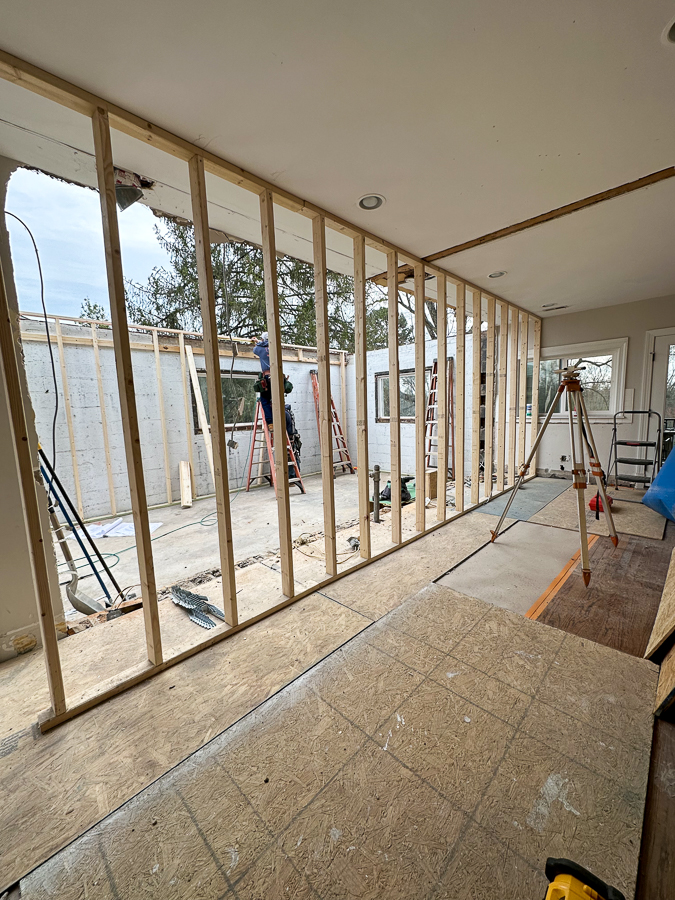
Demoing The Kitchen
Once the blocks and bricks on top of the wall were gone, they could start to demo the kitchen wall we needed to open up all along.
First the kitchen was disassembled (it’s going to Habitat)
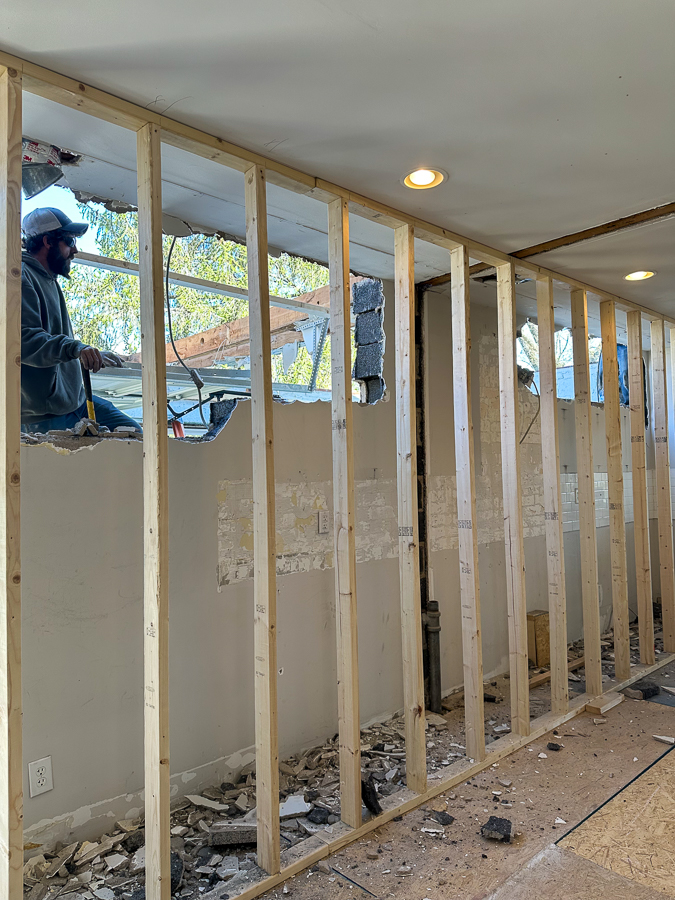
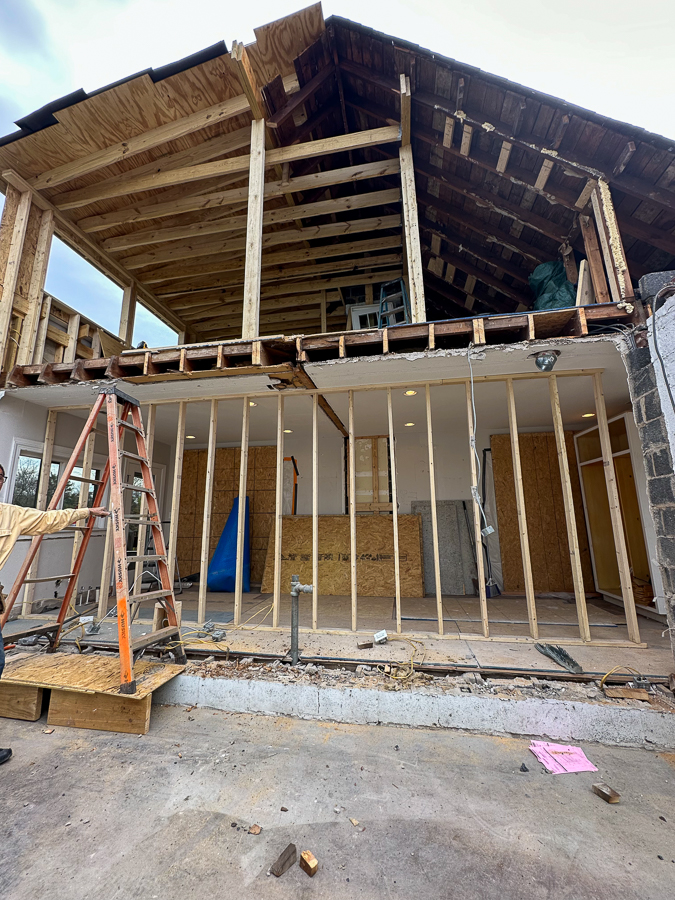
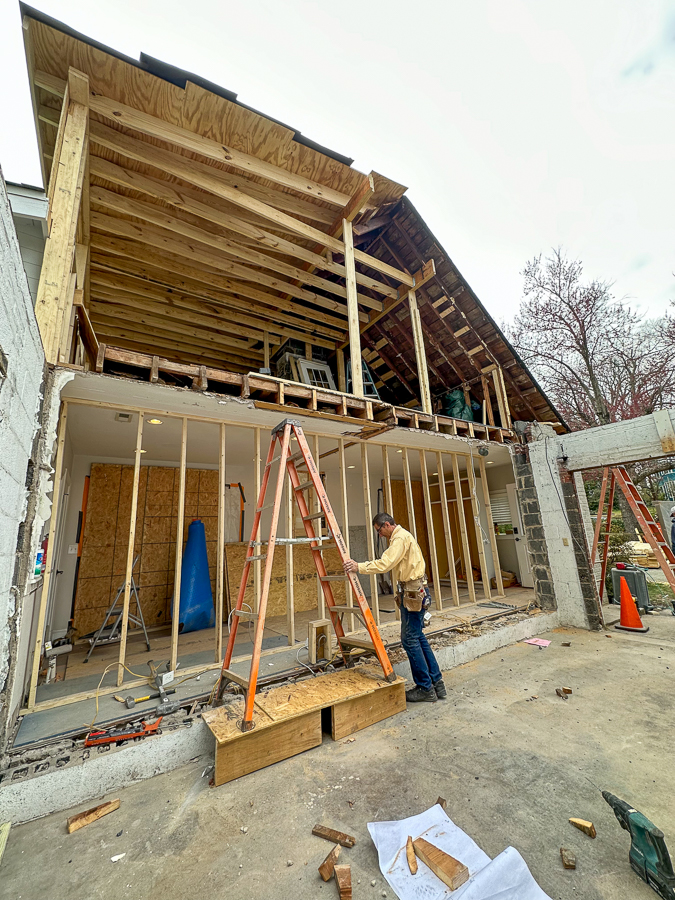
Temporary Wall
And then they put up a temporary wall to hold up the ceiling joists.
And they chipped away at it until it crumbled to the ground.
I did not want to be the one to have to shovel all of that heavy weight in the dumpster! These guys work so hard.
Thomas has been the “office man,” meeting with potential clients and doing all of the business things for years now, but he’s been getting dirty with the crew and doing what he can.
Welcome to our barn!
The joke of this week was that our house was basically an open barn : )
You can see how much of the roof they replaced in this pic.
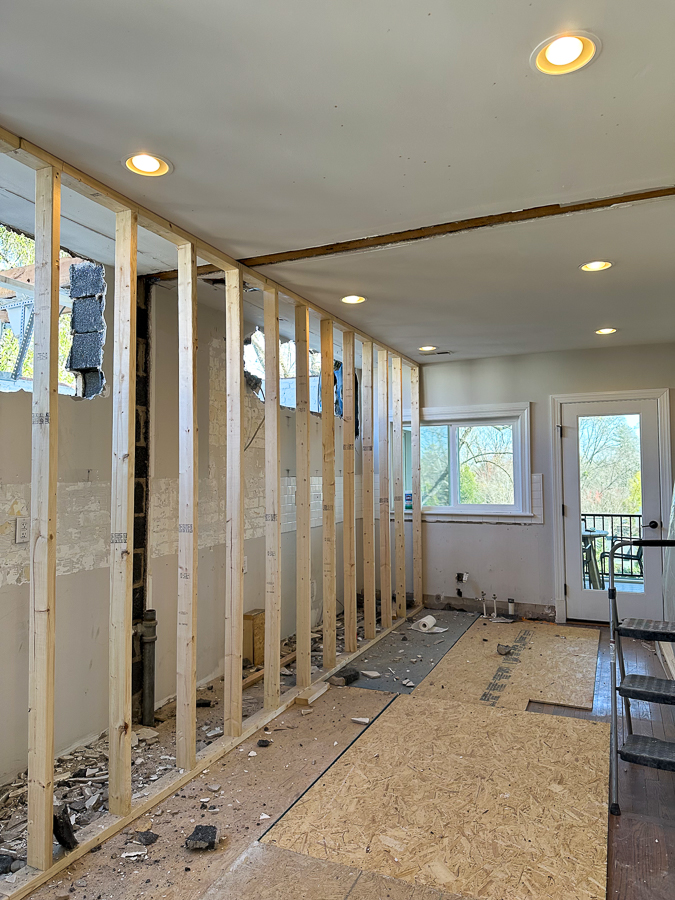
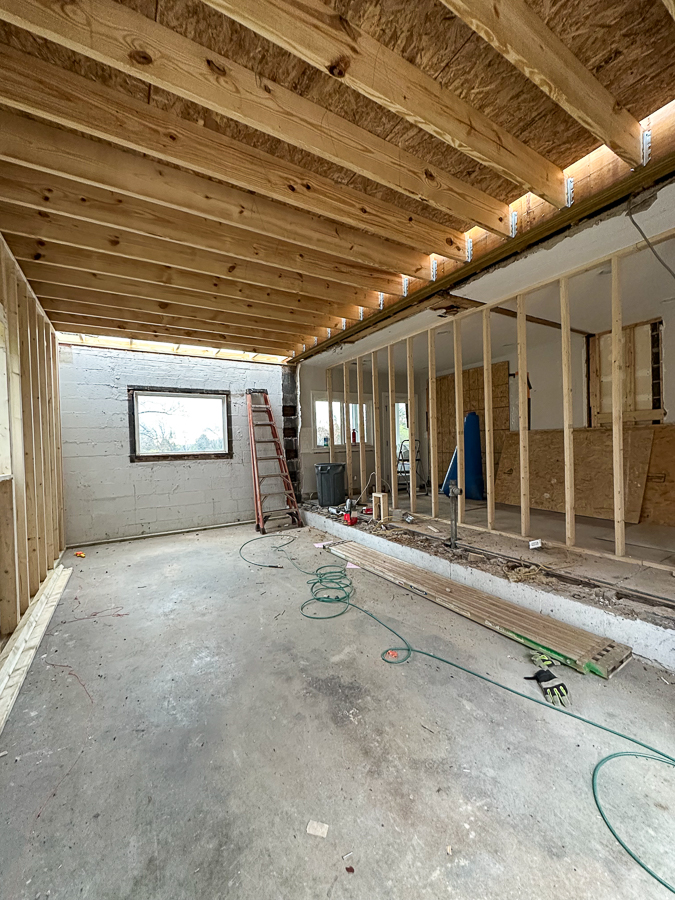
The new kitchen beam
Next a giant beam went in to hold all the joists into place. Talk about heavy work!
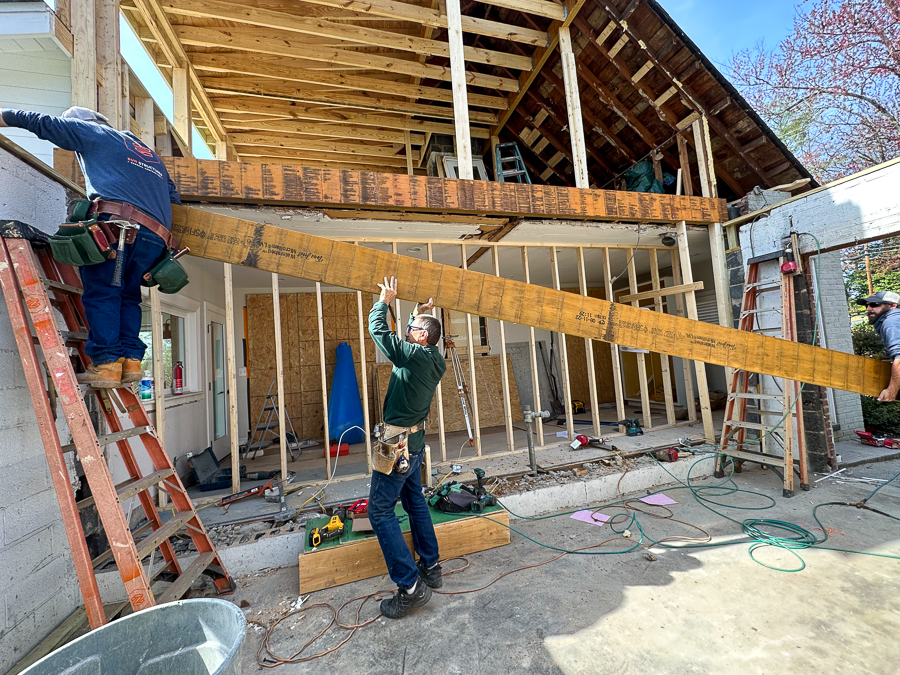
Beam is in!
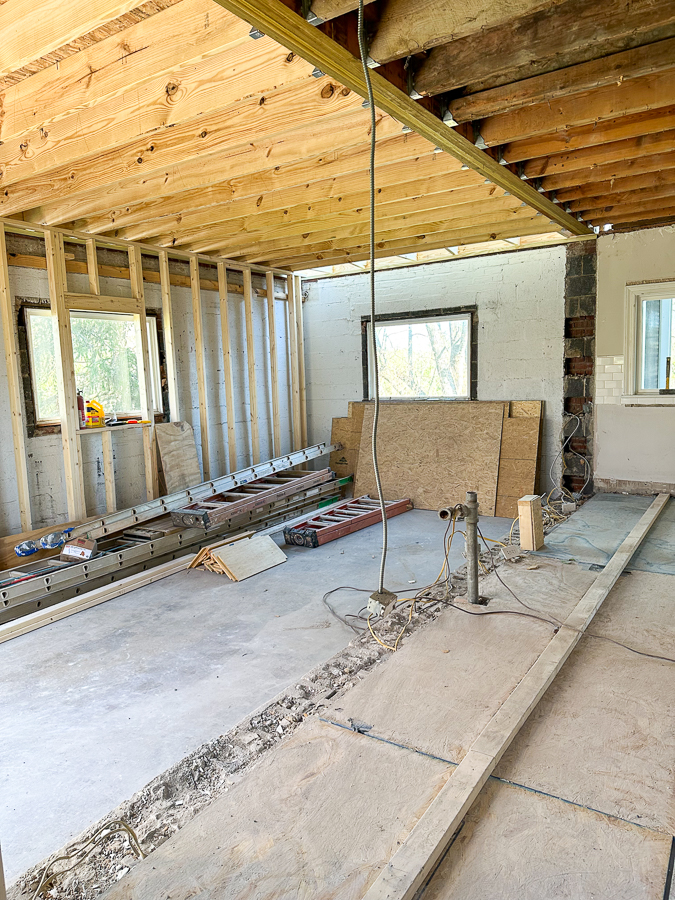
New Kitchen Ceiling Joists
And then the new ceiling could go in, attached to the new beam.
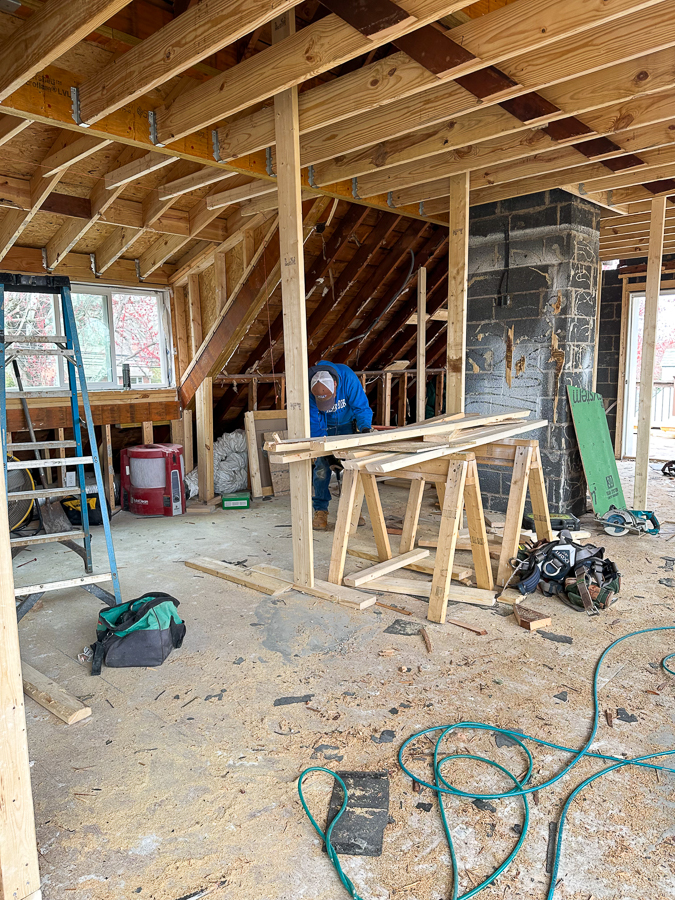
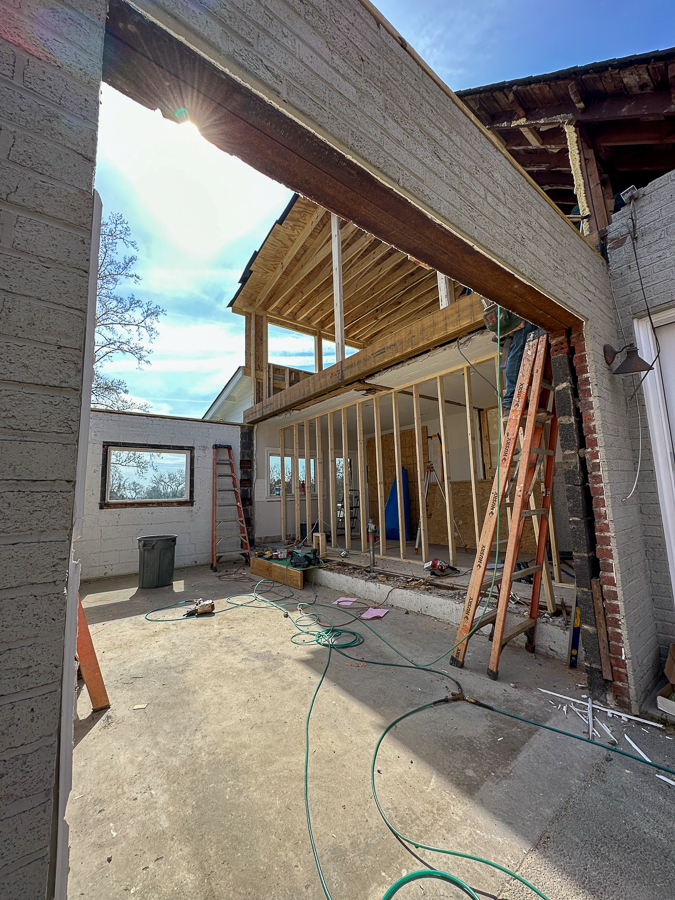
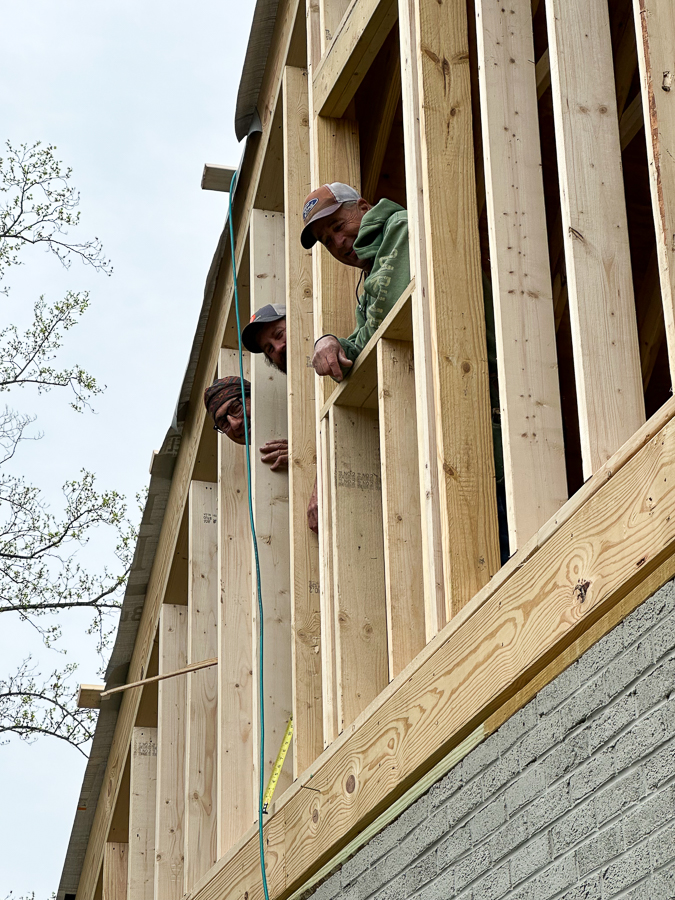
Upstairs Outer Wall Framed + Storage Room
You can see the doorway into the new storage room. This wall couldn’t be built until there was a beam which couldn’t go in with a ton of blocks on top! It’s all a snowball effect.
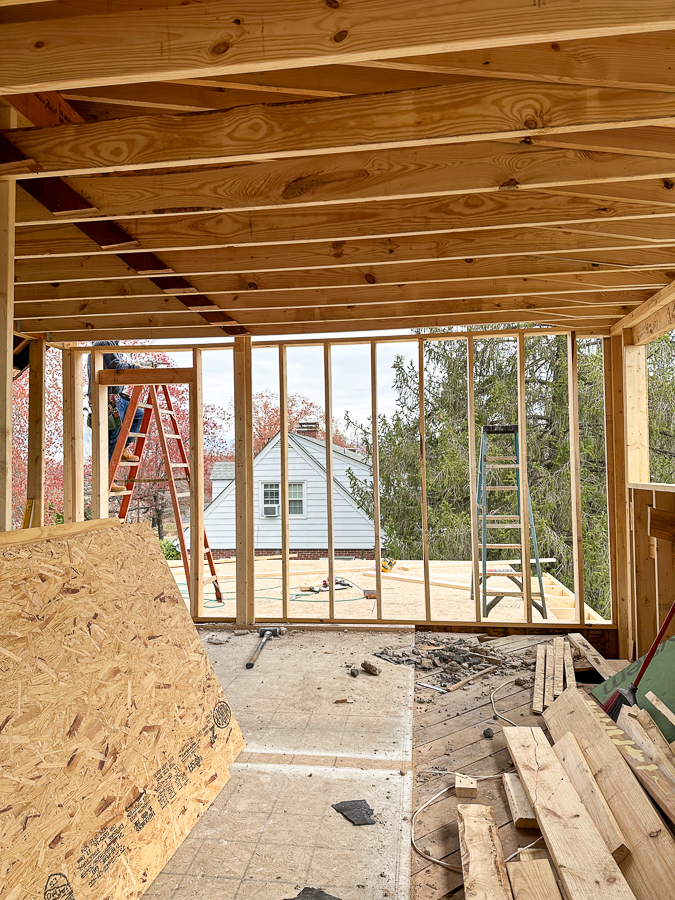
This new attic / storage room will house some of our HVAC and seasonal stuff like skis and Christmas boxes!
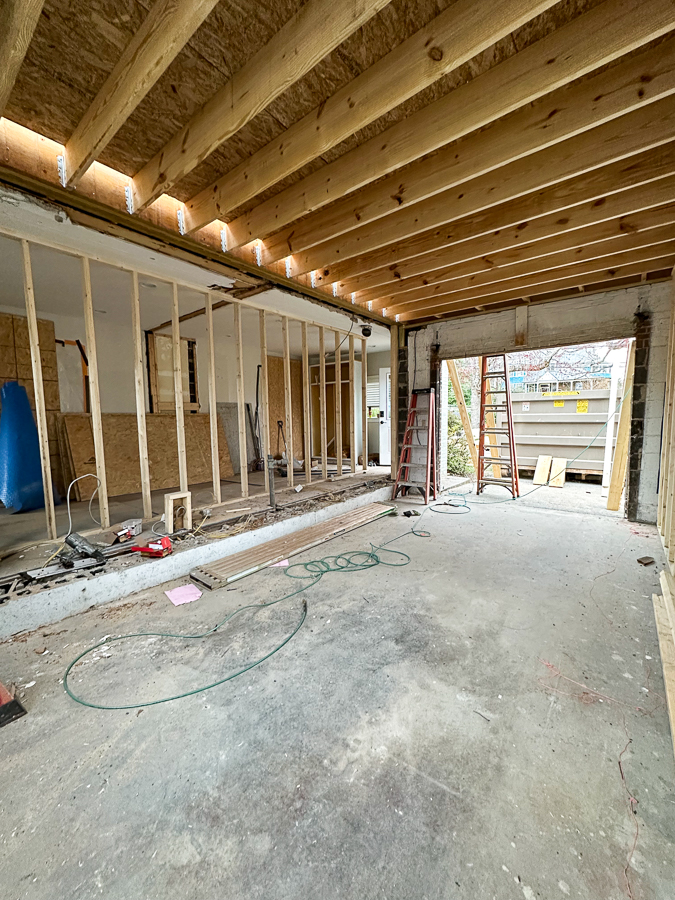
Temporary Kitchen Wall Comes Down
Once the beam was in place, they could connect the old kitchen side ceiling joists to that with brackets and the temporary wall came down. Now it’s one big room! (Thomas also demoed the old kitchen ceiling too.)
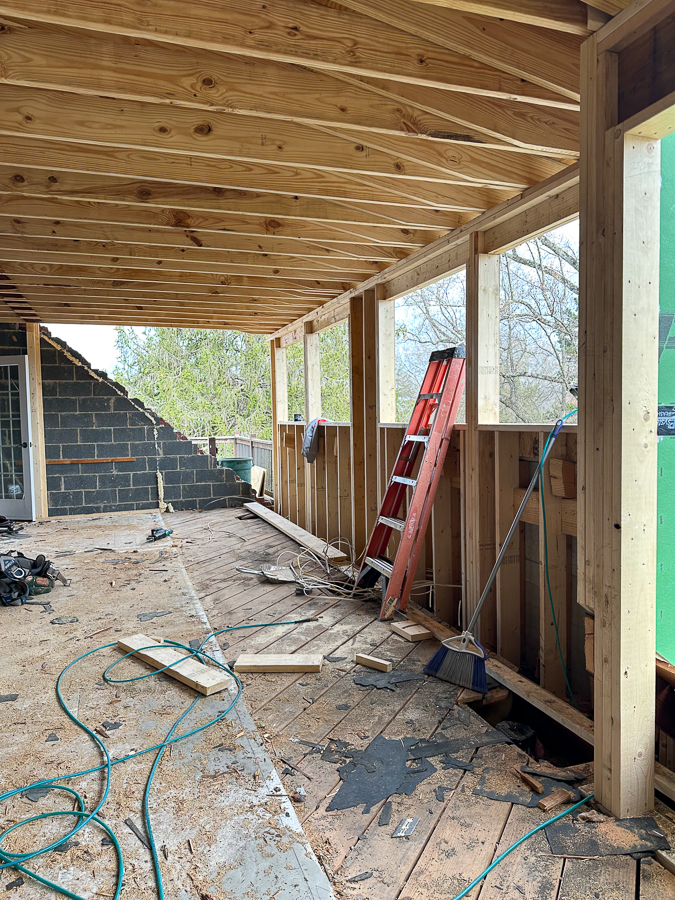
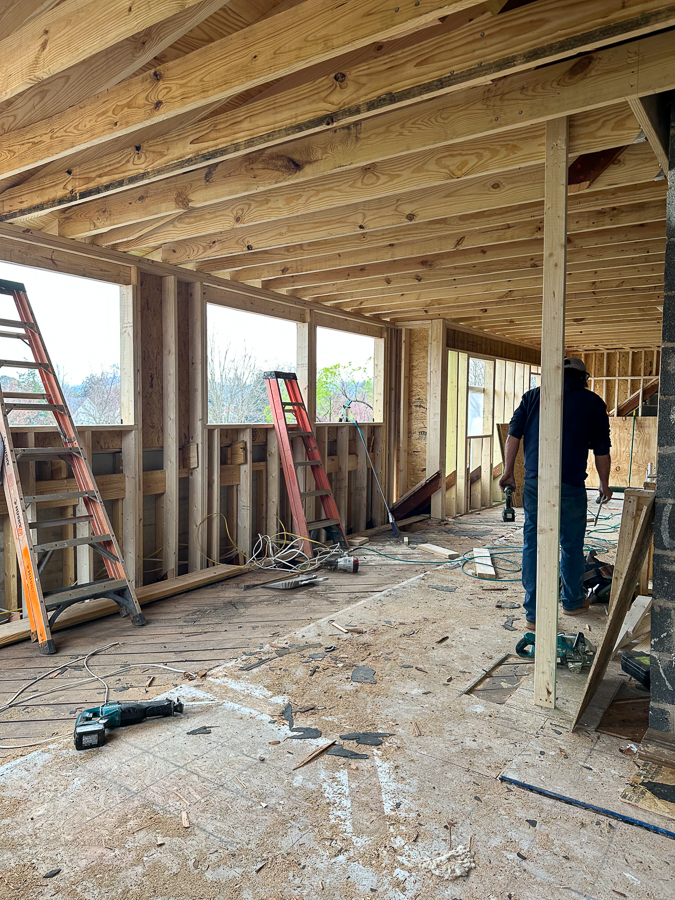
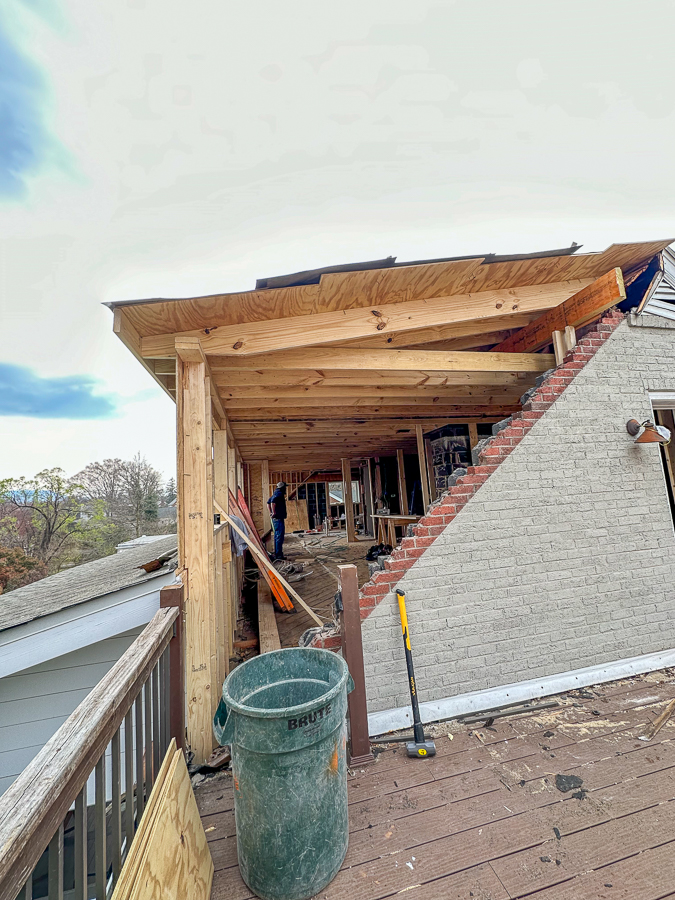
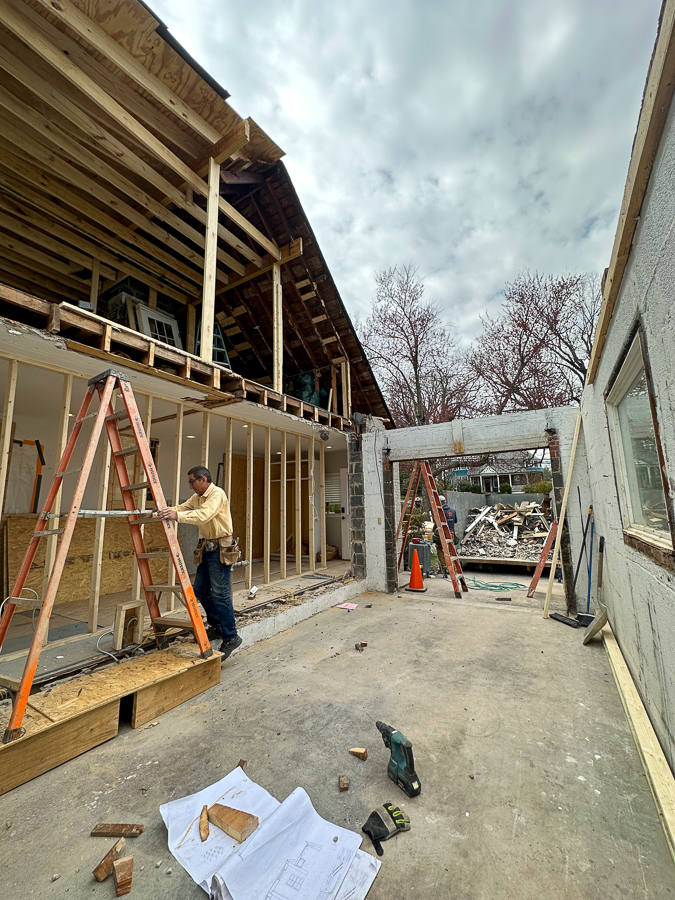
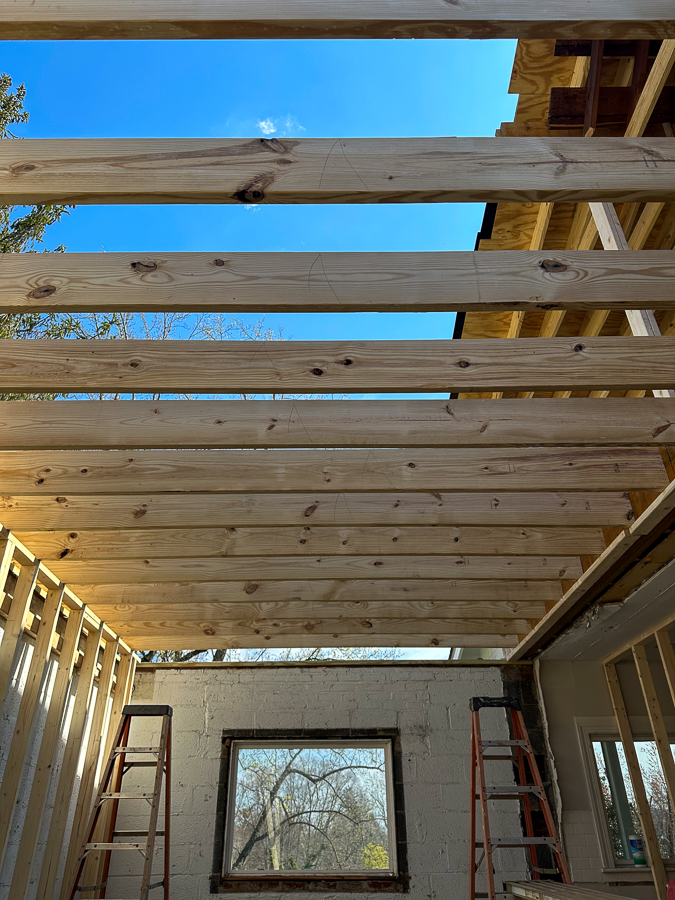
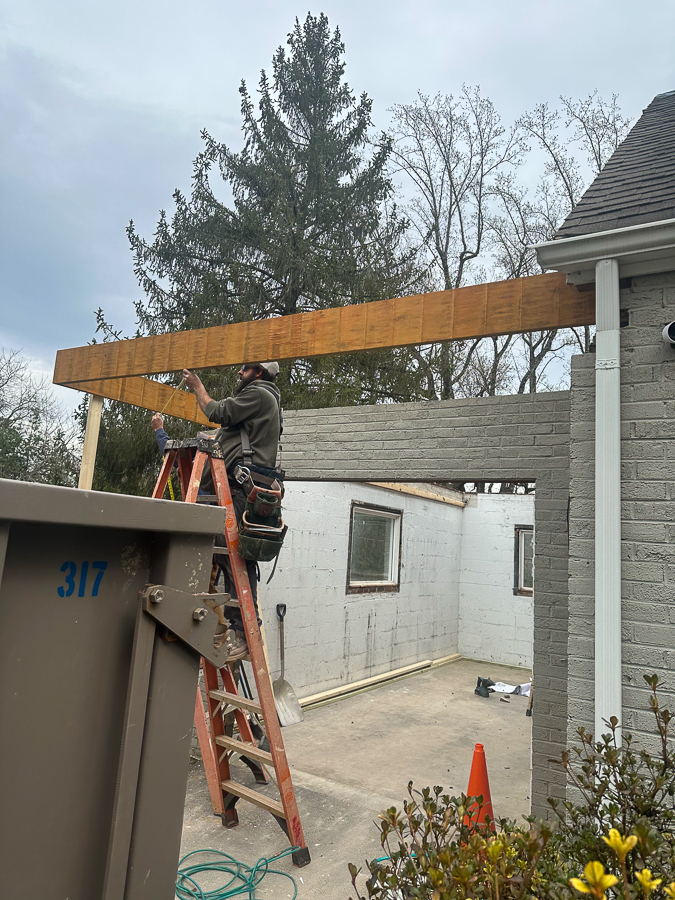
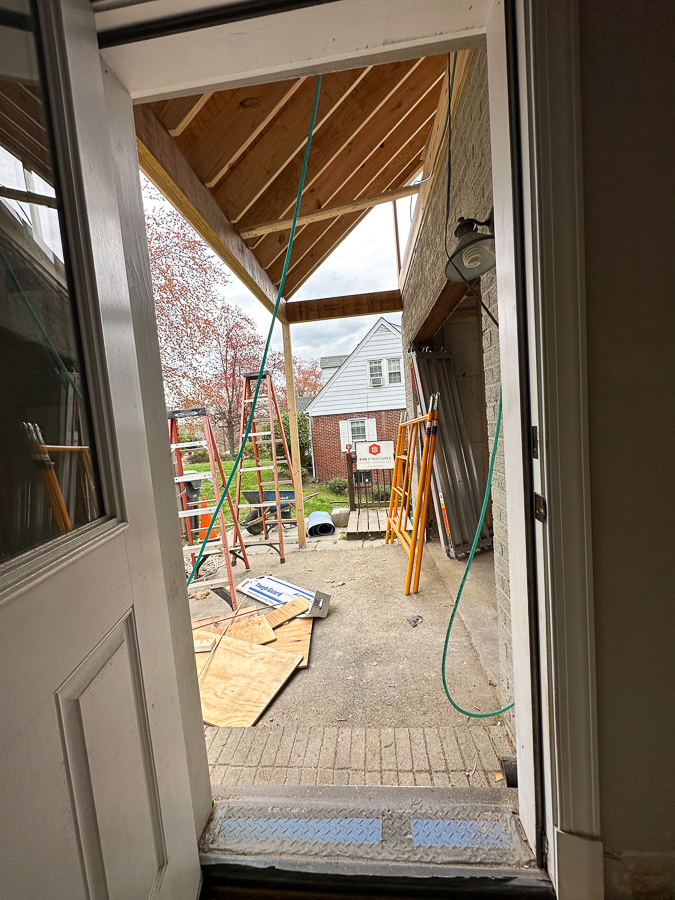
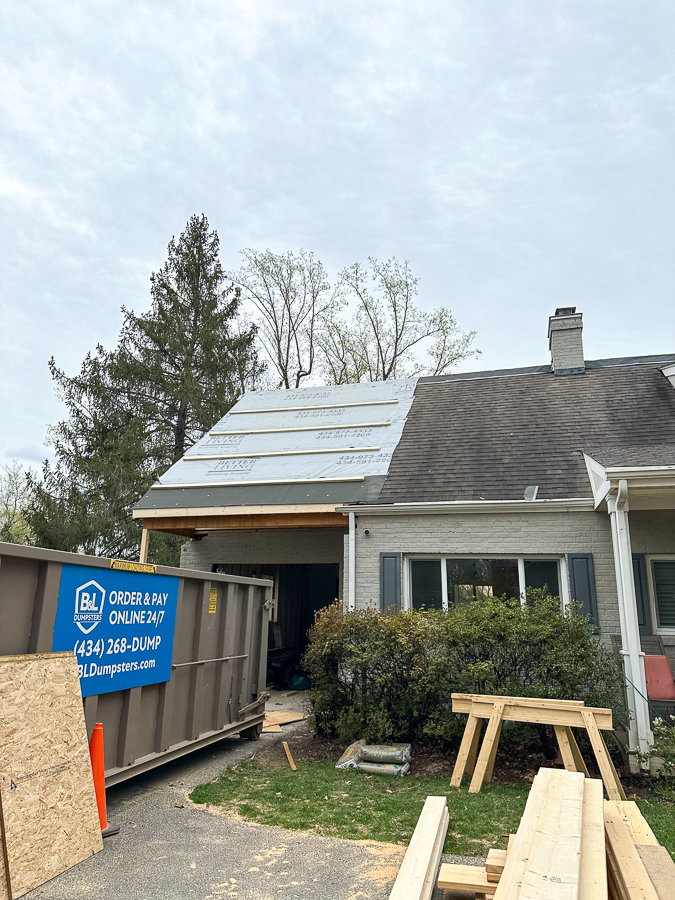
New side porch
The framing for the new side porch went up so the new roof could sit on top of those beams. This side porch is one of the things I am most excited about!
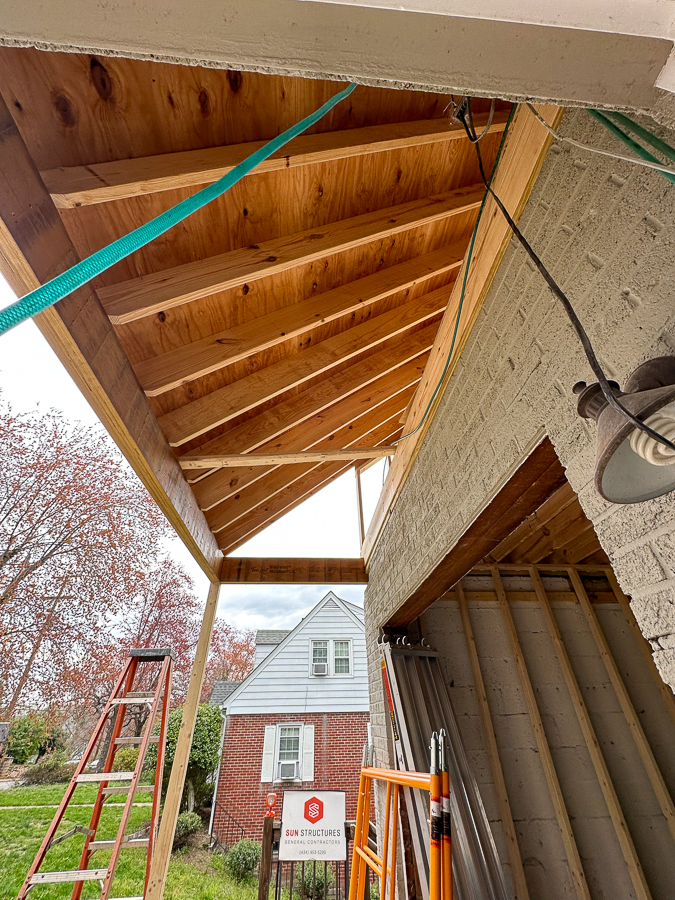
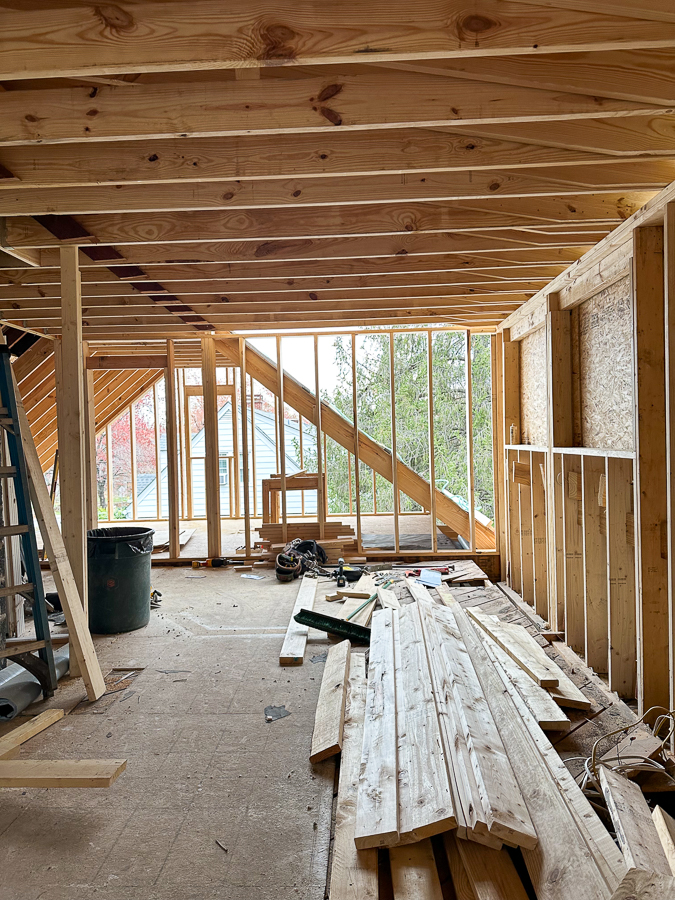
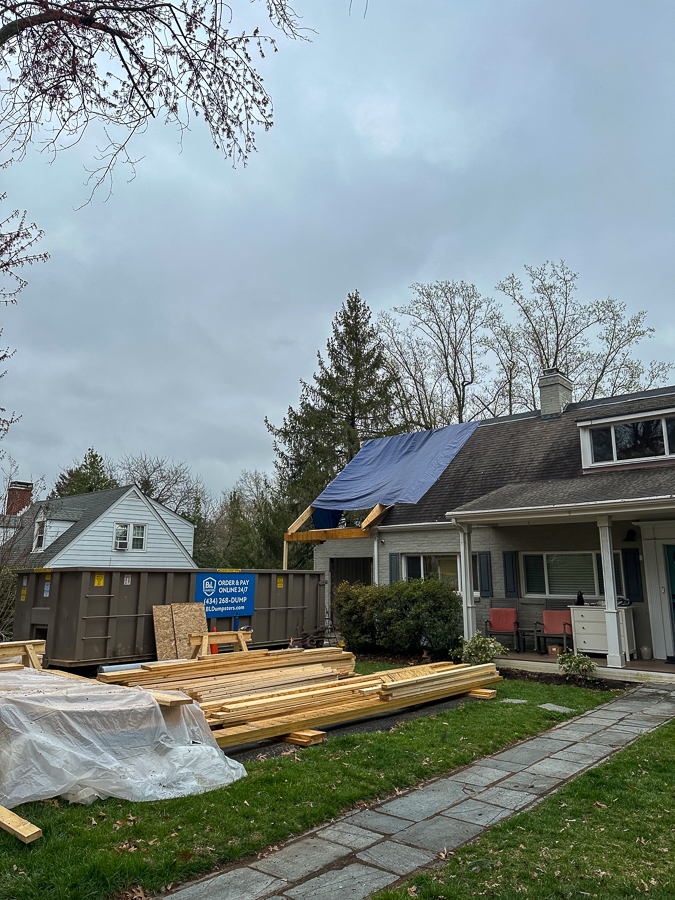
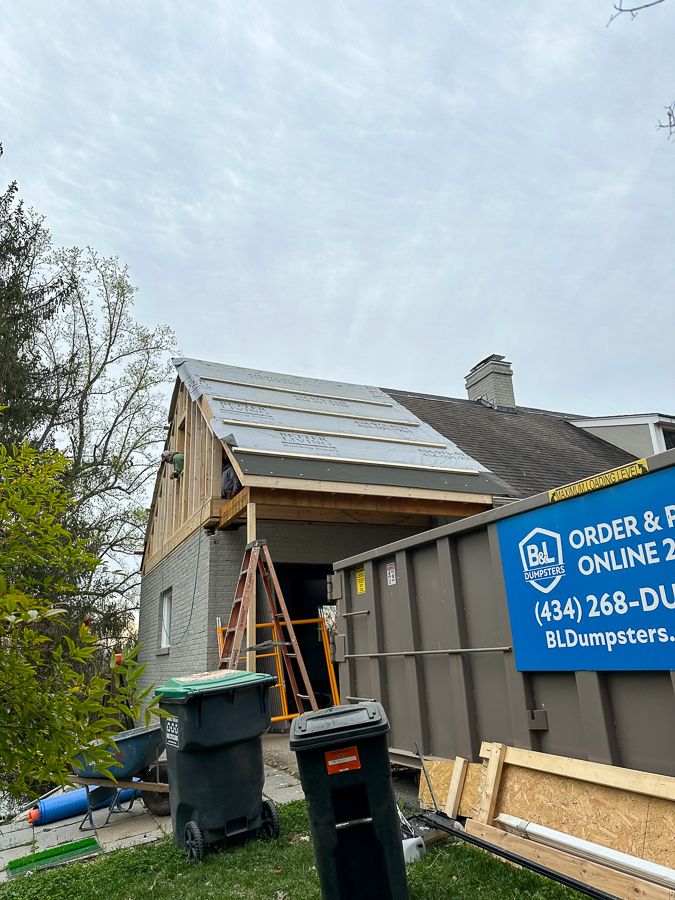
Roofline Framing
Once the new walls and ceiling were in, they could frame the new roof! For a weekend it was a simple tarp while we waited out the weekend rain.
And in a matter of hours on Monday morning they had built a roof!
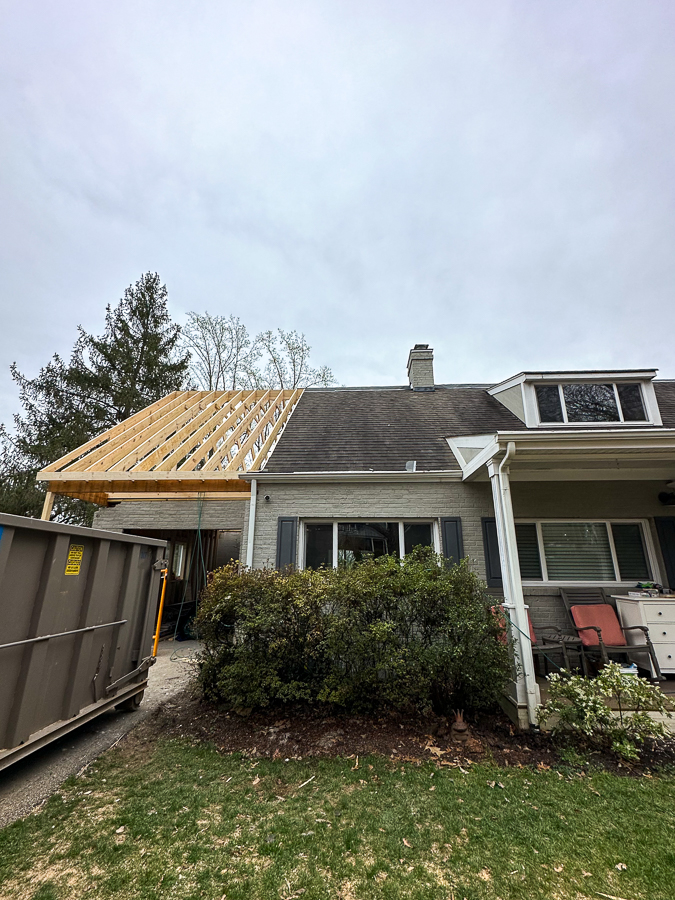
New Roof
We’re getting a new black metal roof that will cover all of the new and old parts. It should be going up at the end of April.


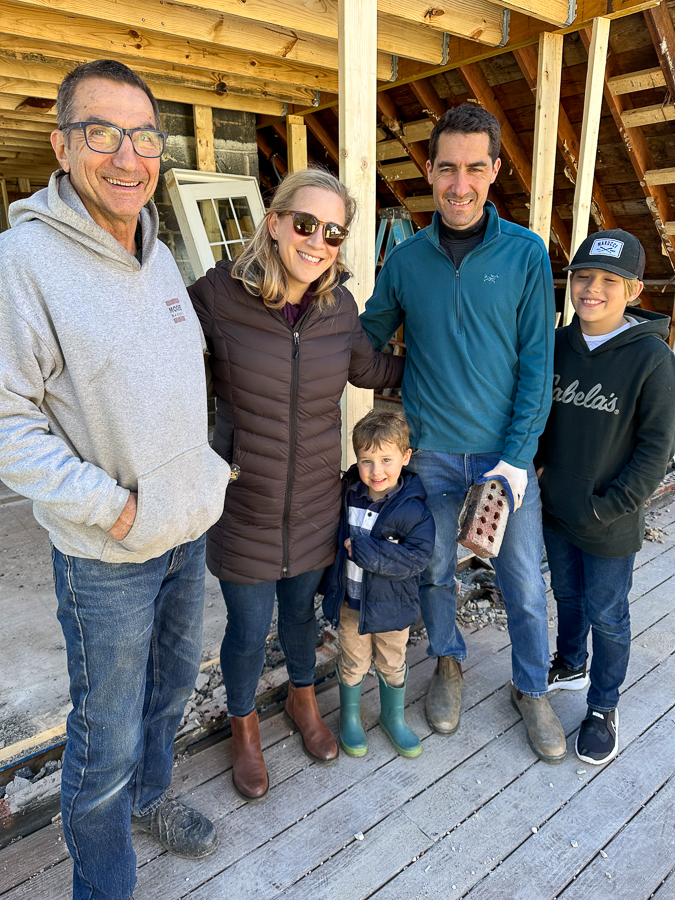
Feed The Crew
Team Sun Structures!
Of course you have to fuel the crew for all this hard work! Duck Donuts for all!

- Click here for all of our renovation blog posts.
- Check out my Instagram story highlight “Demo” for all the live videos!
- Our renovation announcement